From the first login,to complete each round of inspections.
Find what you want to do and follow the entry and steps. Each section has screen guides, completion judgments and operation reminders.
Text content version 1.1.9+19 · Diagram basis 0.1.15+15 · Compilation date 2026-09-23
LIVE GUIDEOperation path
A round of inspection is completed in four steps.
01Sign in and join the organizationConfirm your company and work status first
02Set and dispatch tasksArrange clearly the personnel, location and time
03On-site filing and supplementary documentsScan, fill in and take a photo to save
04Signing, tracking and remittanceSupervisors directly control completion and exceptions
Check with APP 1.1.9+19
Take a minute to get to know this manual
Depending on your work, start with the required chapters.
This manual describes the daily use of EZROUND APP; the web backend and platform internal management are beyond the scope of this manual. The screen and operable items will be different depending on the organization, role, factory and APP version. Please confirm your identity first.
1Administrator settings
2Supervisor assigns tasks
3The inspector fills in the report when he arrives
4Supervisor sign-off and tracking
Android vs. iPhone: How does the screen look?
Each section provides a schematic diagram of the immersive operation in the proportions of Android and iPhone, which can be switched and clicked to enlarge. The picture is rebuilt based on the interface components, buttons and prompts of APP 0.1.15+15, using demonstration data; it is not a screenshot of the actual device.
Both layouts are based on the interface shared by the APP. The mobile phone frame, font size and spacing are for illustration only and do not mean that each mobile phone has been checked. Some pictures only show the blocks or dialog boxes required for this section; the omitted content and appearance conditions are explained below the picture.
The system windows for camera, QR scanning, NFC sensor and third-party login are not simulated by yourself. Please follow the actual prompts on your phone. Expand the "Buttons, Prompts and Exception Handling" of each section to check the button functions, cancellation methods and failure handling.
01
Get started
When using EZROUND for the first time, first log in and join the organization, and then confirm your identity for this job.
all users
1.1 Login to EZROUND
Enter from hereOpen APP → Login screen
Please use the same account you used to join the organization. Different login methods may correspond to different accounts. Don't create another one just because you can't find the task.
Operation steps
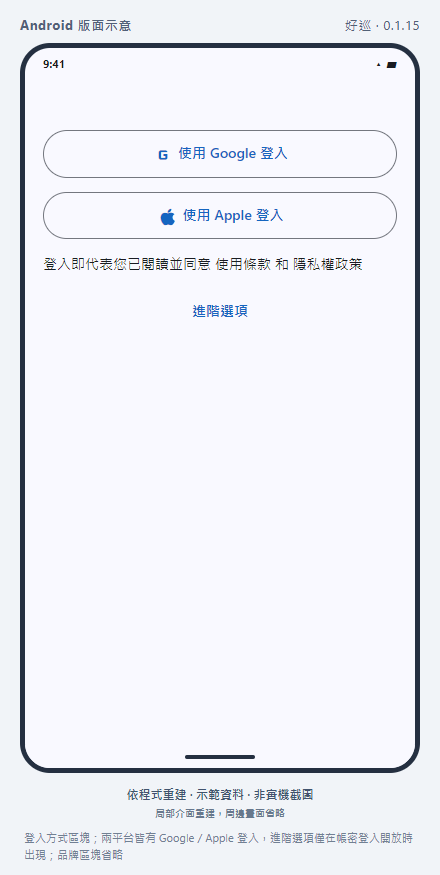
Click "Sign in with Google" provided on the screen; Apple sign in will appear on supported devices and environments. Select an account according to the login window and complete verification.
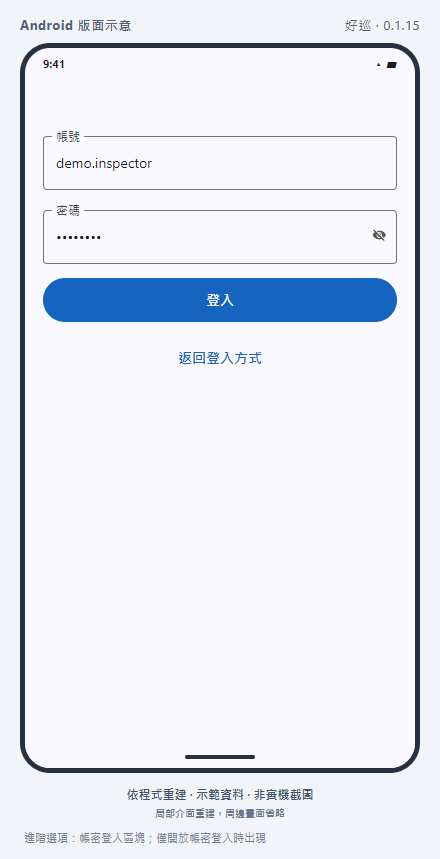
If the company provides an EZROUND account and password, expand "Advanced Options", enter the "Account" and "Password", and then click "Log In".
If you see "My Organization" after logging in, please select the organization you have joined, or follow the next section to apply to join. It is normal that there is no inspection function when the organization has not been selected.
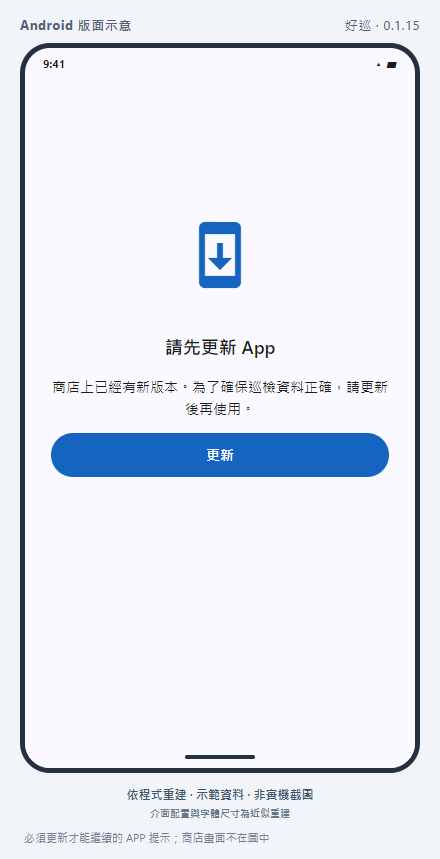
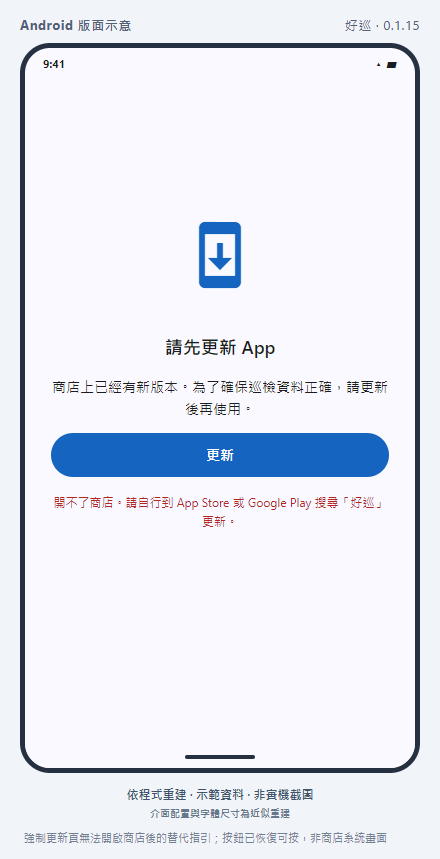
If the screen asks to update the APP, first click "Update" to complete the store update, and then come back to log in.
When you have not joined or selected an organization, the bottom is "Personal Settings, My Organization, About", and My Organization is displayed by default. At this point, you can modify data, log out or view support directly from the bottom without having to search for "More".
How is it completed?
You can see your own organization and enter the homepage of that identity after selecting it.
Operation reminder
The password for Google/Apple login must be managed by the original login service; EZROUND does not provide password reset for such accounts.
Simulation diagram · Click on the image to enlargeAdvanced options: Account and password login block; only appears when the account and password are open for loginPicture based on APP 0.1.15+15 · Non-real machine screenshotsImage-by-image consistency check with text version 1.1.9+19 has not yet been completed
More operation screens (1 status)
Simulation diagram · Click on the image to enlargeLogin method block; both platforms have Google/Apple login, advanced options only appear when account login is enabled; brand block is omittedPicture based on APP 0.1.15+15 · Non-real machine screenshotsImage-by-image consistency check with text version 1.1.9+19 has not yet been completed
Screen guide
Sign in with Google / Sign in with Apple
Advanced options → Account, password, login
Buttons, prompts and exception handling 5 items
Return to login method
When advanced options are turned on, you can return to the Google/Apple login selection.
Terms of Use/Privacy Policy
Reading can be enabled on the login page; when external login is canceled, return to the original login page and select the correct account.
Account or password is not filled in
Complete the information according to the prompts at the bottom of the field and click Login. If login fails, check the login method and do not keep creating new accounts.
The eye icon on the right side of the password field
Click once to show the password, and click again to restore the mask; it only switches the display mode and does not send out the login. Please pay attention to see if anyone around you can see the password.
Android can also use Apple to log in
Both platforms offer Google and Apple login. iPhone's Apple login process uses the native process; Android will start the web login process, follow the prompts and return to the APP.
1.2 Join the company organization and check the review progress
Enter from hereMy organization → Join organization
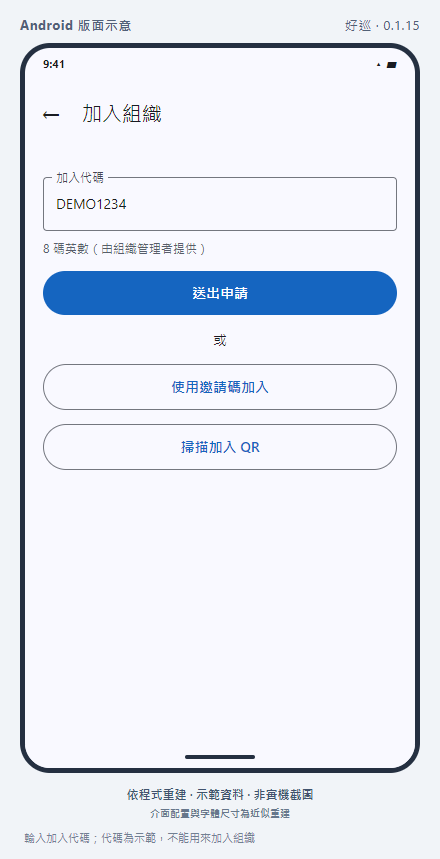
The "joining code" is the entry code provided by the company; after submitting the application, you still have to wait for the manager to review it.
Operation steps
Obtain the 8-digit "join code" from the organization administrator, or the organization's join QR code.
Click "Join Organization", enter the code and click "Send Application"; you can also click "Scan to Join QR" to allow the camera to be used and then align it with the image code.
After seeing "Application Sent", go back to "My Organization → My Applications" to check the status. Please contact the organization administrator pending review.
After approval, go back to "My Organization" to reorganize and click on the organization. If it has been returned, please clarify the reasons before applying again.
How is it completed?
The organization appears in the list, and you can see the authorized functions after switching.
Operation reminder
Don't mistake "application sent" as "joined". Joining codes and targeted invitation codes have different uses.
Simulation diagram · Click on the image to enlargeEnter the joining code; the code is a demonstration and cannot be used to join an organizationPicture based on APP 0.1.15+15 · Non-real machine screenshotsImage-by-image consistency check with text version 1.1.9+19 has not yet been completed
Screen guide
Add code → Submit application
Scan to join QR
My application: Pending review/Added/Returned/Left
Buttons, prompts and exception handling 3 items
Scan to add QR → Flashlight
When the light is insufficient, you can switch to fill light; if you can't scan, you can return to enter the code to join.
Camera won't start
Confirm that camera permissions are allowed; if you still can't scan, use the company-provided text code.
Join code/invitation code
The joining code will send an application to be reviewed; the one-time invitation code will be accepted and you can join directly. You cannot fill in mixed entries.
Enter from hereMy Organization → Organization Invitation
Companies can also directly invite registered accounts. There is no need to wait for joining review after accepting this invitation.
Operation steps
Log in with the account corresponding to the email you were invited to and open "Organization Invitation".
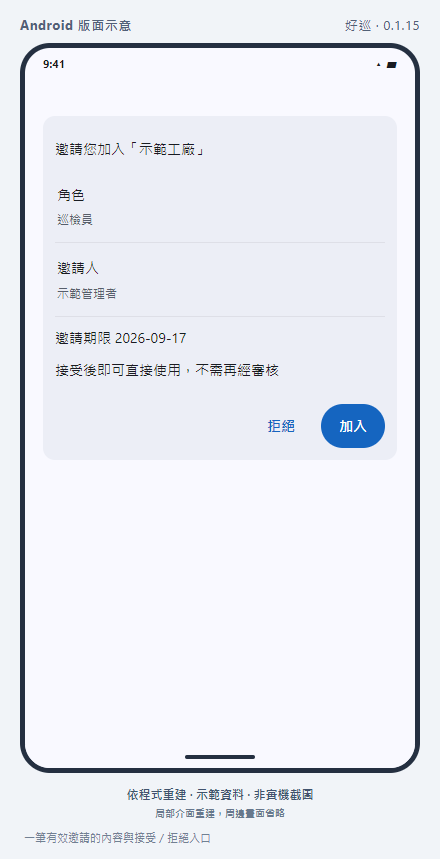
Check the organization name, inviter, role and invitation period to confirm that it is the company you want to join.
Click "Join" and switch back to "My Organization" when finished. If you do not accept, you can click "Reject" and confirm.
If the company provides another one-time invitation code, go to "Join organization → Join using invitation code", enter the invitation code and confirm; you need to use a designated email account.
How is it completed?
See the "Joined" message and be able to switch to the invited organization.
Operation reminder
Targeted invitations are pushed using the APP and no invitation letters will be sent. Even if you have not received the push, you can directly check the "Organization Invitation"; if it is expired or rejected, please ask the administrator to re-invite.
Simulation diagram · Click on the image to enlargeContents and acceptance/rejection of a valid invitationPicture based on APP 0.1.15+15 · Non-real machine screenshotsImage-by-image consistency check with text version 1.1.9+19 has not yet been completed
Screen guide
Organization name, role, inviter, invitation period
Join/Decline
Buttons, prompts and exception handling 3 items
Join
Accept the currently selected invitation; switch to the organization when completed.
Reject → OK/Cancel
After confirmation, the invitation will become invalid and the other party needs to re-invite; if canceled, the invitation will be retained.
The list is empty or the invitation has expired
Confirm login email and reorganize the list; if it has been canceled or expired, please ask the administrator to resend it.
1.4 Get to know the homepage, switch organizations and identities
Enter from hereBottom navigation bar; upper left corner menu
The organization determines which company you work for, and the identity determines which set of operation portals are currently displayed. The owner is an additional organizational relationship, not a fourth switchable identity.
Operation steps
First check the organization name, name, identity and organization clock on the homepage to make sure you have not entered the wrong organization.
To change companies, open "My Organization" and click on the target organization; supervisors can enter from "More → My Organization" or click on the organization name in the menu in the upper left corner.
When you have multiple identities at the same time, open the menu in the upper left corner and select manager, supervisor or inspector in "Switch Identity". The switcher will not appear when there is only one identity.
The bottom of the inspector is "Overview, My Tasks, Scans, My Organization, and More"; the manager is "Overview, Inspection Records, Task Overview, My Organization, and More"; the fourth grid of the supervisor is the "Report Center".
Access other functions from "More". The return arrow in the upper left corner of the function page can go back to the previous page; if the list does not seem to be updated, use the page refresh or pull-down to update.
How is it completed?
The organization, identity and bottom entry are consistent with this work.
Operation reminder
Switching identities will not obtain new permissions for you; if there is no appropriate identity or factory, please ask the administrator to check the role assignment.
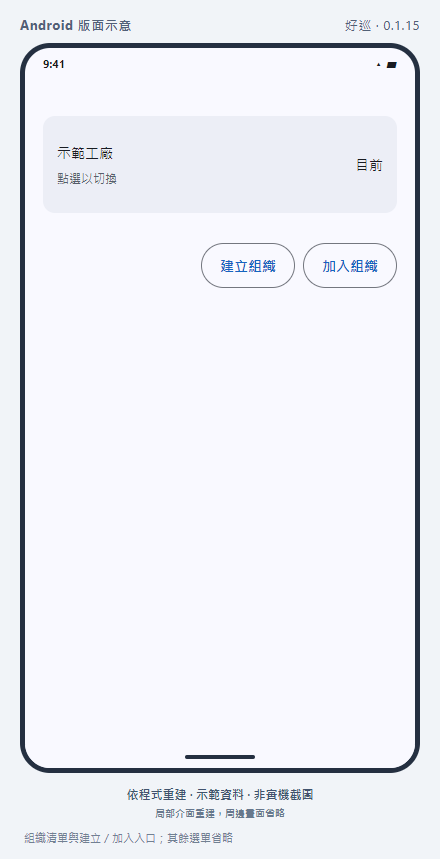
Simulation diagram · Click on the image to enlargeOrganization list and create/join portal; other menus omittedPicture based on APP 0.1.15+15 · Non-real machine screenshotsImage-by-image consistency check with text version 1.1.9+19 has not yet been completed
Screen guide
Menu in the upper left corner: Organization and Identity
Bottom navigation: daily functions
More: Other tools and personal settings
Buttons, prompts and exception handling 3 items
Upper left menu
View the current account/organization; those with multiple identities can switch identities. The bottom and more content will change based on the role.
Organization deactivated
Don't mistake deactivation for not joining; ask your organization manager to check the status.
Return and Refresh
Return to the previous level; the current organization data can be reloaded when the list provides drop-down updates or icons are rearranged.
Enter from hereMore → "Adjust order" in the upper right corner
The position of the "More" function can be adjusted by yourself, so the manual is guided by the function name and does not require memorizing the number of cells.
Operation steps
Enter "More" and click "Adjust Order" in the upper right corner.
Drag the handle next to a feature to move frequently used items to the front.
Click "Save" to complete; if you need to restore, enter the adjustment mode and click "Restore Default".
How is it completed?
When you return to "More", the functions are arranged in the order you set.
Operation reminder
The arrangement of different identities is saved separately.
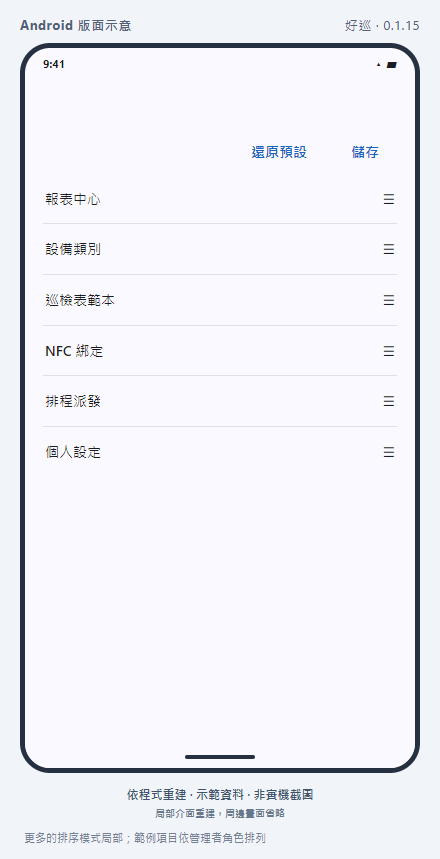
Simulation diagram · Click on the image to enlargeMore sorting mode parts; example projects arranged by manager rolePicture based on APP 0.1.15+15 · Non-real machine screenshotsImage-by-image consistency check with text version 1.1.9+19 has not yet been completed
Screen guide
Reorder → Drag handle → Save
Restore default
Buttons, prompts and exception handling 3 items
Adjust order → drag → save
Drag the handle in adjustment mode and press Save to end editing.
Restore default
Instantly clear custom sorting, return to default order, and exit edit mode without pressing Save again.
It is recommended to look at the supplements first every day, and then look at today’s tasks and deadlines. The on-site process is: Confirm the task → Identify the device with NFC or QR → Fill in → Submit → Confirm synchronization.
inspector
2.1 Organize today's work from your personal overview
Enter from hereBottom "Overview"
The personal overview displays your own to-do and recent inspection results in a concentrated manner.
Operation steps
First check the organization and identity, and then see if the "to be supplemented" contains content requested by the supervisor.
Check "Today's Tasks" and "Overtime Tasks" and click on the card to enter the corresponding list.
Check "Pending Approval" to learn about the records that have been sent and are still waiting to be processed by the supervisor; the trend chart below shows the recent distribution of normal, abnormal and inapplicable.
How is it completed?
Know which tasks will be patrolled today and which ones need to be repaired first.
Operation reminder
The card numbers are examples and do not represent your organization's information.
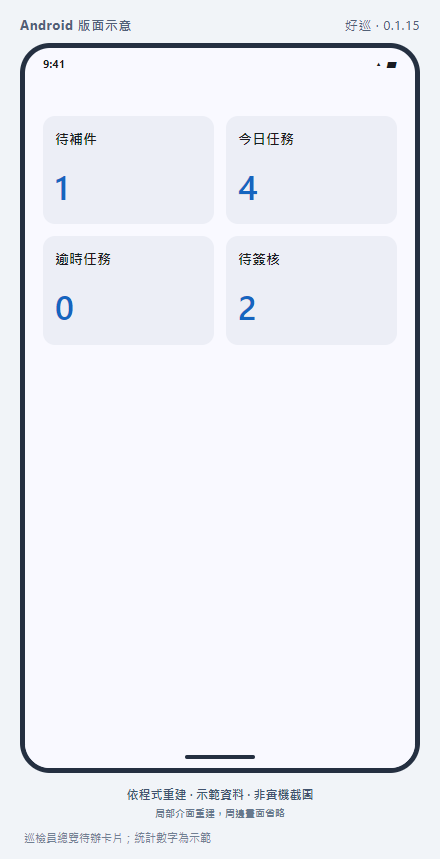
Simulation diagram · Click on the image to enlargeInspector's overview to-do card; statistics as an examplePicture based on APP 0.1.15+15 · Non-real machine screenshotsImage-by-image consistency check with text version 1.1.9+19 has not yet been completed
Screen guide
To-be-replenished items/today’s tasks/overdue tasks/to be approved
My inspection in the past 7 days
Buttons, prompts and exception handling 2 items
To-be-replenished items/today’s tasks/overdue tasks/to be approved
Each card enters the corresponding list; the number zero does not necessarily mean that all organizations have no to-dos.
There is a new version available → Update
Enable store updates; reconfirm the task when you come back.
Enter from here"My Tasks" at the bottom → click Tasks
A task may contain multiple devices. "5/8 points" on the list means that this task has 8 inspection points, 5 of which have been completed.
Operation steps
Open "My Tasks" and select the one you want to do this time based on the task name, factory, and deadline. If necessary, use the upper right corner to filter and select "All, Pending, In Progress, To Be Replenished".
Click on the task and check the task number, deadline, completion progress and equipment list.
After arriving at the scene, press "Scan Inspection Point" and then select NFC sensor or scan QR. For completed points, you can view the latest inspection record.
After completing one point, go back to the details, confirm the progress update, and then move on to the next point.
How is it completed?
Each inspection point in the task has results, and it is confirmed that there are no pending items.
Operation reminder
Point completion and supervisor approval are two different things; "all done" may still be waiting for approval.
Simulation diagram · Click on the image to enlargeEmpty list block when no tasks are assigned; the upper filter entry is omittedPicture based on APP 0.1.15+15 · Non-real machine screenshotsImage-by-image consistency check with text version 1.1.9+19 has not yet been completed
Screen guide
Task name, number, site, deadline
Completed points/total points
Point task → Inspection point list
Buttons, prompts and exception handling 3 items
Filter → All
If you cannot see the expected tasks, cancel the status filter first, and then check the assignee and organization.
Inspection point → View records/replacements
The most recent records can be opened for completed points; the points to be filled in can be refilled; generally, the unfinished points are scanned first.
Prompt completed
Completed points cannot be sent as unfinished points again; check the records first and do not fill in duplicate information.
Enter from here"Scan" at the bottom; or task details → Scan inspection points
Both NFC and QR tags can be used to identify devices. Please make sure your phone supports and has enabled it before using NFC; please allow camera permission before using QR.
Operation steps
Stand in front of the device you want to check, enter "Scan" and select the labeling method according to the screen. For NFC, please place your phone's sensing position close to the device label and stay for a moment; for QR, please place the complete image code within the scanning range of the camera.
Verify the device name after identification. If there is only one unfinished task assigned to you, you will be directed to the fill-in page; if there are multiple unfinished tasks assigned to you, select the correct one based on the task name and deadline.
If you enter the scan from a specific task, the system will check whether the device belongs to the task; if it does not match, please return to confirm the task and label.
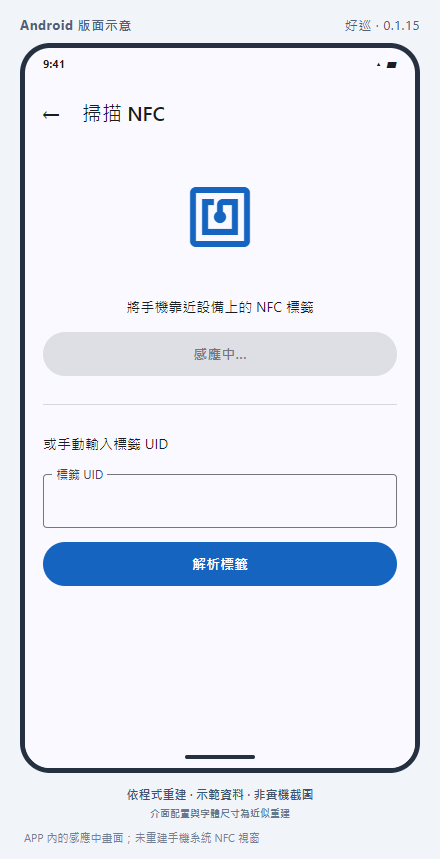
If the NFC sensing fails, you can press "Sensor NFC" to try again; if the QR scanning fails, please check the camera permissions, light, focus, and image code integrity before trying again. The manual field is only applicable to NFC tag UID; the inspection QR tag must be scanned with the camera by pressing "Scan QR". Photo albums or manual input cannot be used to replace on-site scanning.
How is it completed?
The device name on the fill-in page is consistent with the field device.
Operation reminder
"Unfinished inspections that are not assigned to you" usually check the task assignment and completion status, but it does not mean that the NFC or QR tag is necessarily damaged. Recognizing the label does not mean that the task has been obtained. You must still check the equipment and tasks on the screen.
Simulation diagram · Click on the image to enlargeThe NFC sensing screen in the APP; QR scanning and mobile phone system windows are subject to the actual device.Picture based on APP 0.1.15+15 · Non-real machine screenshotsImage-by-image consistency check with text version 1.1.9+19 has not yet been completed
Screen guide
Sensor NFC/scan QR → device identification
Multiple tasks → Select task
NFC tag UID → parse tag
Buttons, prompts and exception handling 5 items
There are no outstanding inspections assigned to you
Check the device and account, and ask your supervisor to check the assignment; scanning the label does not mean that the task has been obtained.
Multiple task selection windows
Enter according to the correct task name and deadline; inspection will not be sent after cancellation.
NFC is not supported/not turned on, or the QR camera is not available
For NFC, please check the phone and system settings; for QR, please check the camera permissions and scanning environment. Patrol QR tags can only be scanned with a camera; manual UID only works with NFC and must still comply with company regulations.
The QR content is incorrect/prompts that the camera must be scanned
Go back to "Scan QR" and realign the complete image code on your device; do not select images from the photo album, and do not paste the QR content into the manual field.
Sensing timeout/not read
The current upper limit of the program's waiting time is 20 seconds; adjust the position of the phone and the tag before re-sensing.
2.4 Fill out the inspection form, report abnormalities and take photos
Enter from hereSuccessful identification of equipment → Inspection filling page
Different devices may use different forms. An asterisk * indicates required; fill in the fields according to the fields you see and the situation on site.
Operation steps
First confirm the device number and name, and then select "Normal, Abnormal, N/A". Generally, new inspections will not select Normal for you in advance.
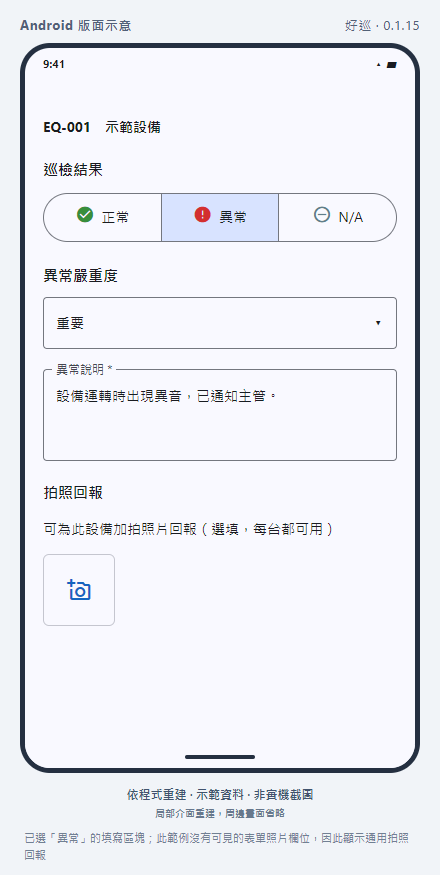
Normal: Fill in values, options, text or dates according to the form. Exception: Also select the severity of "Normal, Important, Emergency" and fill in the exception description, such as location, phenomenon and handling taken.
Only select "N/A" if it is confirmed on-site that it is not applicable this time; this option will skip form field verification. Don't use it to skip unfinished checks.
When you need photos, select "Photography" or "Album" in the photo field; if you see the general "Photography Report" in the diagram in this section, press the camera plus sign first, and then select the photo source. Make sure the photos are clear and correspond to the device, and comply with the maximum number of photos in the field.
Complete all required fields shown in order and scroll down to the Submit button. If a field appears because the answer has changed, please complete it as well.
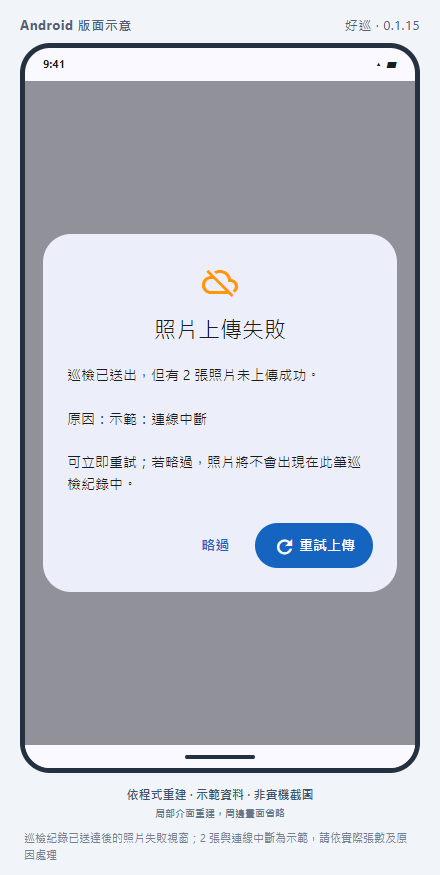
Click "Send Inspection" and wait for the results. If a prompt appears in the field, correct it before sending it; if it shows that the photo upload failed, the inspection record has been sent and only some photos were not successful. Prioritize "Retry Upload" to confirm that the photos are also successful and do not resubmit the entire inspection.
How is it completed?
You see "Sent" and there are no photo failure or pending synchronization prompts.
Operation reminder
The schematic diagram shows the partial screen after selecting an exception in the new inspection. The send button is at the bottom of the form. The return reason banner will only appear for replacement items. When the photo upload fails, the inspection record has been delivered. Selecting "Skip" will only give up the retry of this failed photo, and will not cancel the inspection record; those photos will not appear in the record.
Simulation diagram · Click on the image to enlargeFill-in block with "Exception" selected; this example has no visible form photo field, so a generic photo report is displayedPicture based on APP 0.1.15+15 · Non-real machine screenshotsImage-by-image consistency check with text version 1.1.9+19 has not yet been completed
More operation screens (1 status)
Simulation diagram · Click on the image to enlargePhoto failure window after inspection records have been delivered; 2 photos and connection interruption are examples, please handle according to the actual number of photos and reasons.Picture based on APP 0.1.15+15 · Non-real machine screenshotsImage-by-image consistency check with text version 1.1.9+19 has not yet been completed
Screen guide
Equipment → Inspection results → Abnormal severity and description
Dynamic field → Photo → Scroll down to send
Buttons, prompts and exception handling 6 items
Unselected results/fields with red text
Select the inspection results first; follow the prompts to modify the required fields, value range, format or length, and then click Send.
Removal on photo thumbnail
You can remove the incorrectly selected photos and reselect them before sending; this only changes this form.
Sending out
Wait for the result, do not double-click to send or leave immediately; check the photo after receiving the success message.
Photo upload failed → Retry upload/Skip
At this time, the inspection record has been delivered. Do not resubmit the entire inspection. "Retry upload" will only re-upload the unsuccessful photos; "Skip" will not cancel the record, but those photos will not appear in this record.
The number and reasons of photo failure windows
The window will list the number of photos that were not uploaded successfully and the reasons; the blank space outside the window will not be closed when you click on it. After reading the reason, click "Retry Upload" first and do not resubmit the entire inspection.
Skip and return to the previous page
If you select "Skip", the APP will display "Sent (N photos not uploaded)" and return to the previous page, where N is the number of photos that still failed. This means that the inspection record has been delivered, but all the photos have not been successful; please check the record and do not assume that returning to the previous page means that the photos are complete.
2.5 After the supervisor returns it, the replacement will be sent out.
Enter from hereOverview → Pending items; or My tasks → Pending items
The supplement is to fill in the gaps pointed out by the supervisor and send it again to the supervisor for confirmation.
Operation steps
Start the task of parts to be replenished and click on the returned inspection point.
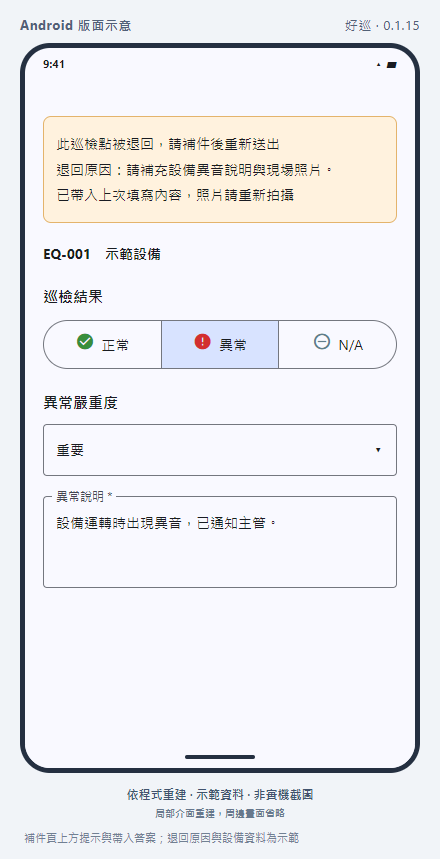
Read the "Reason for Return" above, such as missing photos or readings that need to be confirmed.
If the last record is read successfully, first check the answers, inspection results and exception descriptions brought in, and then make corrections on site; if not, you need to confirm and fill it out again. The photo needs to be taken or selected again, and the last photo will not be automatically used.
After sending, confirm success, and then check the record. Supervisors can review previously submitted and returned comments from the "Processing Process".
How is it completed?
The new submission has been sent and is waiting for re-approval by the supervisor.
Operation reminder
If a timeout prompt appears at the same time, you also need to fill in the reason for the re-recording; the replenishment and the re-recording may occur at the same time.
Simulation diagram · Click on the image to enlargePrompts and answers are provided at the top of the supplement page; reasons for return and equipment information are examples.Picture based on APP 0.1.15+15 · Non-real machine screenshotsImage-by-image consistency check with text version 1.1.9+19 has not yet been completed
Screen guide
Reason for return → Check the last content (brought in when read successfully)
Please re-take the photo → re-send it
Buttons, prompts and exception handling 4 items
Reason for return
Read the supervisor's requirements first, and then check the answers you have brought in; pictures need to be reselected.
Submission completed
New submissions are reviewed by the supervisor again, and old content can be reviewed from the process.
The form is opened, but the old answers are not brought in
When the last record reading failed, the add-on form may still be opened, and the old answer loading failure message will not be displayed. Blank does not mean that the old record has been deleted; recheck the site and fill it in, and check the last content from the record history if necessary.
The form itself failed to load
If the screen displays a loading error and retry entry, confirm the connection first, then click Retry to reload the form. This is different from the situation where the form is open and just doesn't bring in the old answers.
2.6 If the task is overdue, please fill in the reason
Enter from here"Task has expired - additional notes" appears when sending.
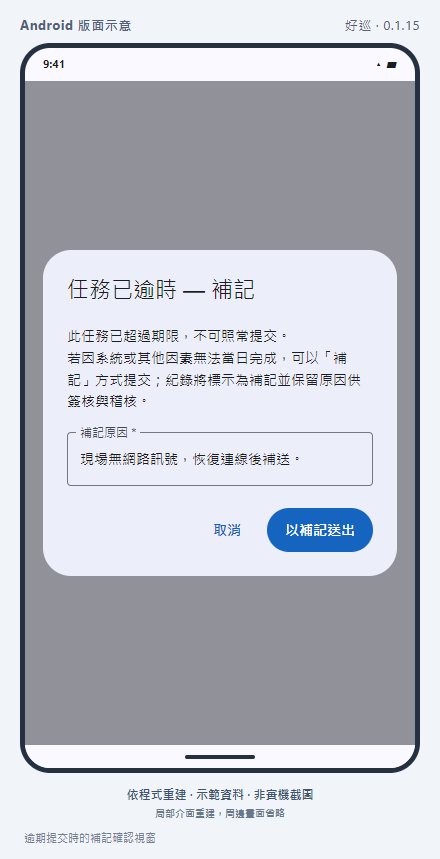
Make-up records are submitted after the deadline, and the actual reasons are retained for the supervisor to interpret, and overtime will not be turned into on-time completion.
Operation steps
Read the timeout prompt and check whether you selected the wrong task date.
If it is indeed this task, please fill in the specific reason for the re-recording, such as "There is no network on site, and it will be re-delivered after the connection is restored at 09:20."
Click "Send as add-on" and wait for the system to display that the submission is completed.
After sending, confirm that the record has a "remark" mark and the reason, and is waiting for approval by the supervisor.
How is it completed?
If the supplementary record is successful, the record will retain the task ownership date, sending time and reason.
Operation reminder
The task date of the report may be different from the actual delivery date; it is especially necessary to check when making up records across multiple days.
Simulation diagram · Click on the image to enlargeConfirmation window for additional entries when submission is overduePicture based on APP 0.1.15+15 · Non-real machine screenshotsImage-by-image consistency check with text version 1.1.9+19 has not yet been completed
Screen guide
The task has expired - additional notes
Reason for add-on * → Send as add-on
Buttons, prompts and exception handling 2 items
Cancel
Closing the add-on window does not mean that this submission has been completed.
Reason for supplementary note → Send with supplementary token/Resend with supplementary token
Fill in the actual reason; being returned is another process, and a supplementary note cannot be used to replace the supplement requested by the supervisor.
Supervisors and managers can use daily management functions; lists and operations are still subject to organization and site authorization restrictions.
supervisor, manager
3.1 View overall progress and exceptions
Enter from hereBottom "Overview"
Use the overview to find out what needs to be done, then click on the list to see the details.
Operation steps
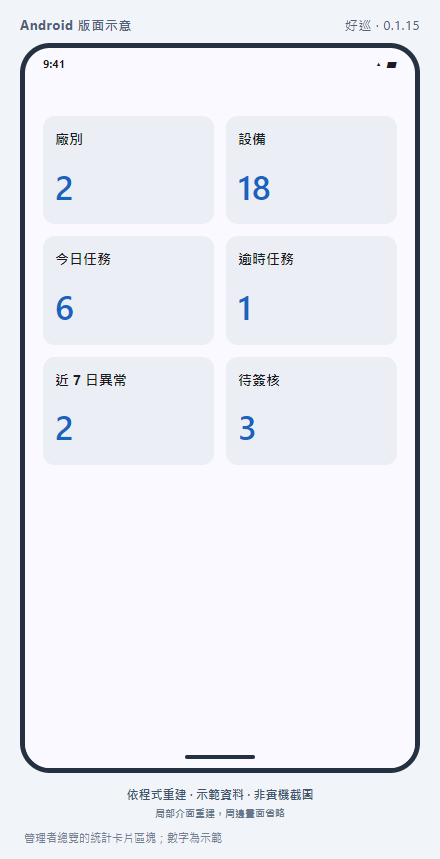
View today's tasks, overdue tasks, exceptions and quantities to be approved; click on the corresponding card to view details.
In the inspection results area, switch to 7 days, 14 days or 30 days to view the trend; click on the date to view the record of that day.
In addition, managers can enter corresponding management functions from the factory, equipment and member cards to be reviewed.
Pay attention to the storage usage and file lock prompts; if the data does not seem to be updated, pull down and refresh.
How is it completed?
Corresponding tasks or inspection records can be found from the numbers.
Operation reminder
Abnormal reports are on-site results; sign-off is a confirmation record. Approval of the exception record does not mean that the equipment failure has been repaired.
Simulation diagram · Click on the image to enlargeStatistical card block for manager overview; numbers are examplesPicture based on APP 0.1.15+15 · Non-real machine screenshotsImage-by-image consistency check with text version 1.1.9+19 has not yet been completed
3.2 Exception list: look at the current situation and the handling process
Enter from hereOverview → Recent exception cards
Abnormal events are different from the number of submissions. Returns and replacements at the same inspection point should not be directly treated as multiple independent events.
Operation steps
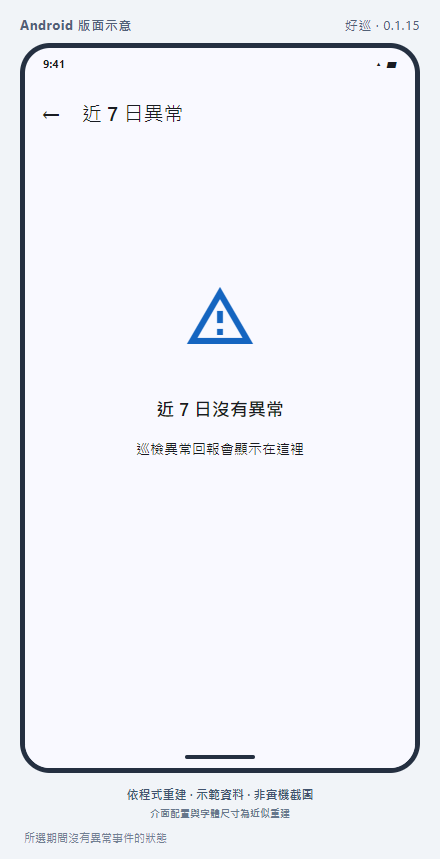
Select the period you want to view in the overview, and then click the exception card to enter the list. The list is queried based on the period selected in the overview.
Check the equipment and factory, and read the inspection results and approval status separately; if there are multiple submissions, the number of submissions will be displayed.
Compare the task date and delivery time. The two may be different when the task is overdue.
Click on the event to view the inspection details and processing history, and confirm the reason for return, subsequent replacement parts and the latest results.
How is it completed?
It can explain the current results of this incident, the approval progress, and how it was handled before.
Operation reminder
Events that were once abnormal may appear normal after patching; you need to look at the process to understand the changes, and you cannot assume that there were no abnormalities just by looking at the latest label.
Simulation diagram · Click on the image to enlargeThere are no abnormal events during the selected period.Picture based on APP 0.1.15+15 · Non-real machine screenshotsImage-by-image consistency check with text version 1.1.9+19 has not yet been completed
Screen guide
Equipment/Factory → Latest inspection results + sign-off status
Multiple submissions: number of submissions
Task date/send time → click for details and processing process
Buttons, prompts and exception handling 2 items
event column → details
An event may have multiple submissions; the latest normal does not erase previous exceptions.
rearrange
Re-query the selected period and current authorization scope.
Enter from here"Task Overview" at the bottom → Dispatch tasks
For temporary inspection or trial patrol, a single task can be assigned first. Start by preparing the device, usable form, NFC or QR tag and inspector authorization.
Operation steps
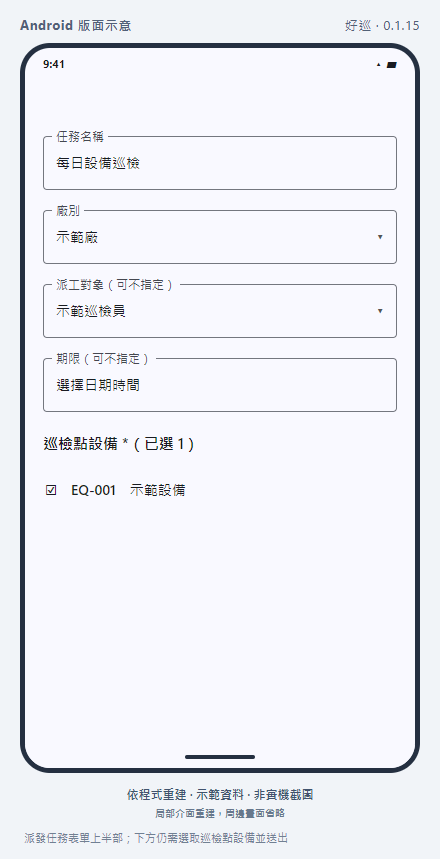
Click "Dispatch Task" and enter a task name that can identify the work content, such as "Daily Inspection of Air Conditioning in the First Factory Area".
Select the factory and then select the dispatch object. If you do not specify it temporarily, you still need to confirm who will execute it after it is created. After changing the factory, the originally selected devices will be cleared and must be selected again.
Set a deadline; if it is not specified, it will be handled according to the organizational rules, and it cannot be understood to mean that it will never be overdue.
Check the equipment to be inspected this time, select at least one inspection point, and then send it for distribution.
Return to "Task Overview" to search for new tasks, confirm the number of equipment, assignees and deadlines; ask the inspector to reorganize "My Tasks" to confirm receipt.
How is it completed?
The new task appears in the overview, and the assignee can see the correct inspection point.
Operation reminder
The device list is loaded according to the factory range; if the device cannot be found, check the factory, device settings and permissions first.
Simulation diagram · Click on the image to enlargeThe upper part of the dispatch task form; the inspection point equipment still needs to be selected and sent belowPicture based on APP 0.1.15+15 · Non-real machine screenshotsImage-by-image consistency check with text version 1.1.9+19 has not yet been completed
Screen guide
Task name, factory, dispatch object, deadline
Inspection point equipment → dispatch tasks
Buttons, prompts and exception handling 4 items
Select date time
Specify the period; leave it blank to follow the organization's default processing.
Select factory first
Equipment options are loaded according to factory type; if there is no equipment, please ask the administrator to add equipment and authorization first.
The dispatch object is not specified
After creation, go to the task overview to confirm and arrange assignees; it does not mean that every inspector can receive it.
Change site
Changing the site will clear the originally selected devices and reload the list. Please re-check the inspection points and check the equipment and quantity before sending it out.
Enter from hereMission overview → "⋯" on the right side of the mission
The overview can be searched by task number or name, and jobs can be filtered by status.
Operation steps
Search for tasks and select to be processed, in progress, completed, overdue, to be signed off, approved or to be supplemented as needed.
Click on the task or "View Inspection Point" to confirm which equipment has been completed and which still needs to be processed.
When you need to replace someone, click "Reassign" on the task menu and select the assignee; "Cancel Assign" will remove the current assignee.
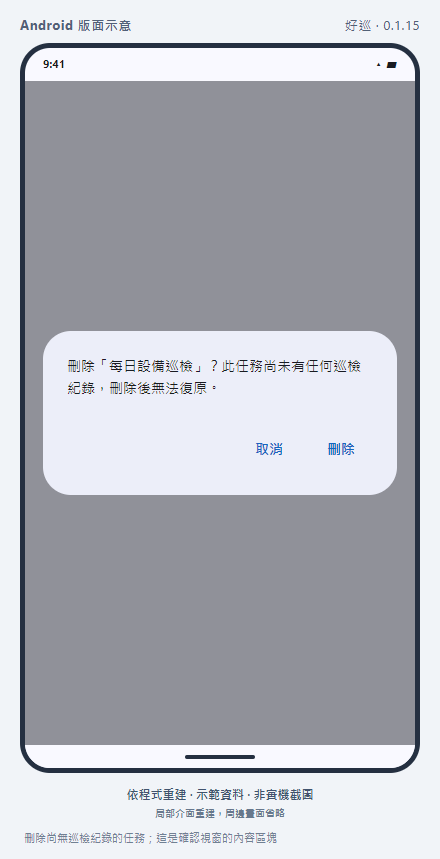
If "Delete Task" appears, first check the name and confirmation message. Only qualified tasks such as inspection records that do not yet have inspection records can be deleted. Executed records should not be hidden by deletion.
How is it completed?
The list displays the new assignee or the updated status; after reassignment, please ask the new assignee to reorganize and confirm.
Operation reminder
Deletion is an irreversible operation. When there is an execution record, it will be processed according to the method allowed by the screen.
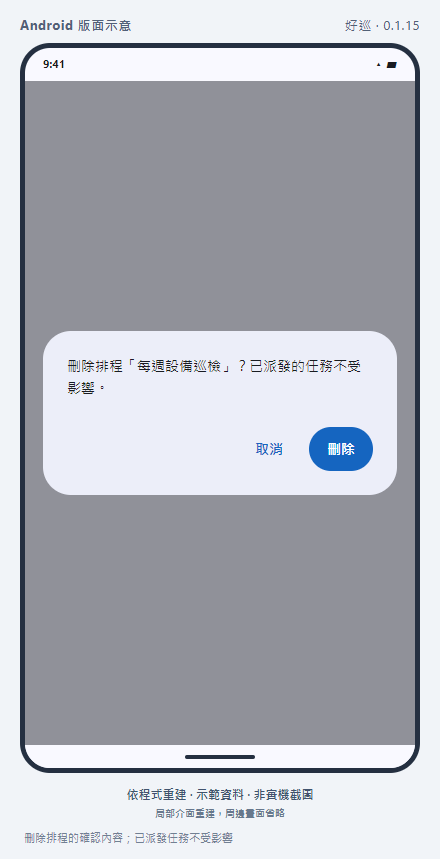
Simulation diagram · Click on the image to enlargeDelete tasks that do not have inspection records; this is the content block of the confirmation windowPicture based on APP 0.1.15+15 · Non-real machine screenshotsImage-by-image consistency check with text version 1.1.9+19 has not yet been completed
Screen guide
Task search and status filtering
⋯ → Check inspection points/reassign/delete when conditions are met
Buttons, prompts and exception handling 3 items
Search/status filter
Search for a task number or name, then use status to narrow the list.
Reassign → Unassign
Change the task to Unassigned; be sure to assign someone else when someone needs to perform it.
Delete task → Delete/Cancel
Currently, tasks that do not have inspection records can be deleted; once confirmed, they cannot be restored.
Enter from here"Inspection Record" at the bottom → pending approval → click record
Before signing, look at the content and photos, not just the "normal/abnormal" labels.
Operation steps
Select "Pending Approval" and click on the transaction to be processed.
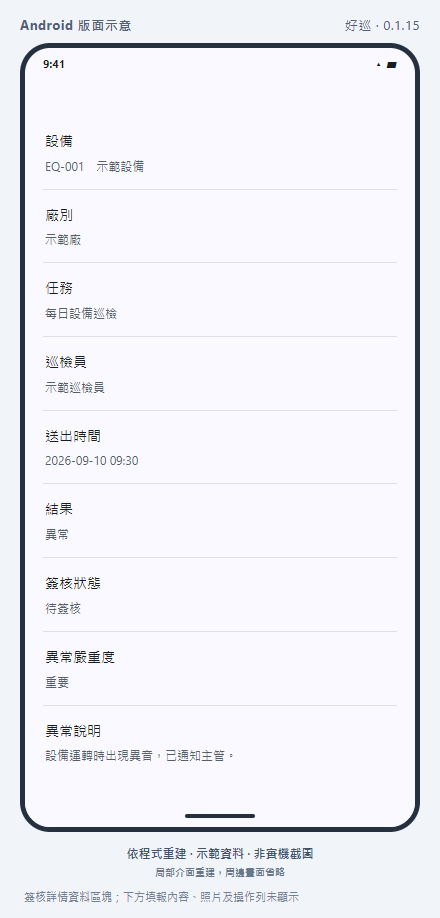
Check the equipment, factory, tasks, inspectors and time; if there are any additional notes, read the reasons. Then check the filled-in content, abnormal description and photos.
When the content is sufficient and meets the company's requirements, click "Approval".
When you need to refill, click "Return", fill in the specific reasons, and then click "Confirm Return", for example, "Please take a new photo of the pressure gauge scale and re-confirm the outlet temperature."
Return to the list and switch to "Approved" or "Returned" to check the results; for multiple submissions, you can view the before and after details in the "Processing Process".
How is it completed?
The record is moved to the correct approval state; the returned inspection point can be filled by the inspector.
Operation reminder
When a photo appears locked, it does not mean it has been deleted; please clarify the shared space usage first to avoid approving it when there is insufficient evidence.
Simulation diagram · Click on the image to enlargeApproval details block; the content, photos and operation columns below are not displayedPicture based on APP 0.1.15+15 · Non-real machine screenshotsImage-by-image consistency check with text version 1.1.9+19 has not yet been completed
Screen guide
Pending approval/approved/returned
Click record → fill in the content, photos, and processing process
Buttons, prompts and exception handling 4 items
approve
Single approval is sent directly without a second confirmation window; the content check is completed first.
Return → Confirm return/cancellation
Confirm after entering the reason clearly; cancellation will not be refunded.
Only view, no approval/return
It may be that the role, record status or permissions are different. Check first and do not treat it as a button failure.
Processing process
Read the submission content, results and approval comments one by one, and distinguish the latest information from old submissions.
Enter from hereInspection record → awaiting approval → "Batch Approval" in the upper right corner
Records that have been confirmed one by one can be approved at once.
Operation steps
Click the batch approval icon in the upper right corner of the "Pending Approval" list to enter the selection mode.
Check the records that have been checked and check the number of records displayed in "Approval Selection".
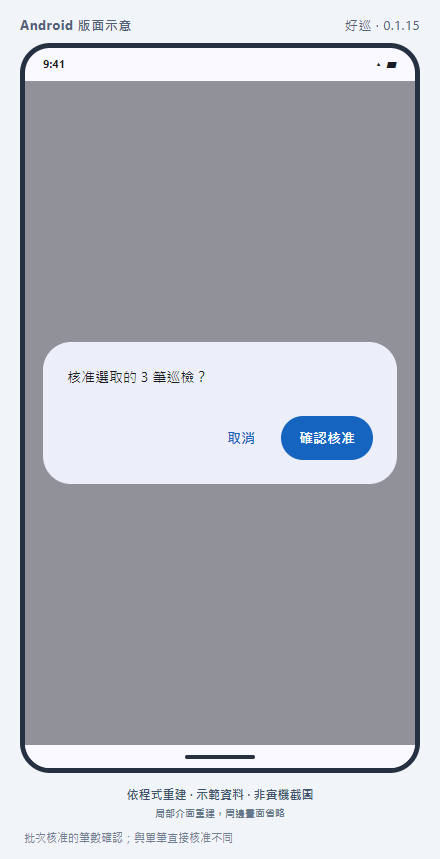
Click "Approve Selection", check the number of transactions again in the confirmation window and confirm.
Check the number of successful and failed transactions; if some failed, reorganize and process the remaining records one by one.
How is it completed?
The selected records have been approved, or it is known which ones were unsuccessful.
Operation reminder
The batch success message may include the number of failed transactions. Don't just see "Approved" and ignore the second half. If you reorganize during the batch selection, the selection mode will exit and the check will be cleared; please re-enter the batch mode, check and select.
Simulation diagram · Click on the image to enlargeConfirmation of the number of batch approvals; different from single direct approvalPicture based on APP 0.1.15+15 · Non-real machine screenshotsImage-by-image consistency check with text version 1.1.9+19 has not yet been completed
Screen guide
Batch Approval → Check → Approve Selection
Confirm approval/cancel selection
Buttons, prompts and exception handling 3 items
Deselect
Exiting batch mode will not approve the records just checked.
Confirm approval
Confirm after checking the number of transactions; when partial failure is shown, only the projects that have not been successful will be processed.
rearrange
Pressing the rearrange icon or pulling down to update will exit the batch selection mode and clear the check box. This will not approve those records; you will need to re-enter batch mode, check and check after updating.
Enter from hereSupervisor: "Report Center" at the bottom; Manager: More → Report Center
CSV is suitable for opening and organizing with spreadsheet software; ISO PDF is a single inspection report.
Operation steps
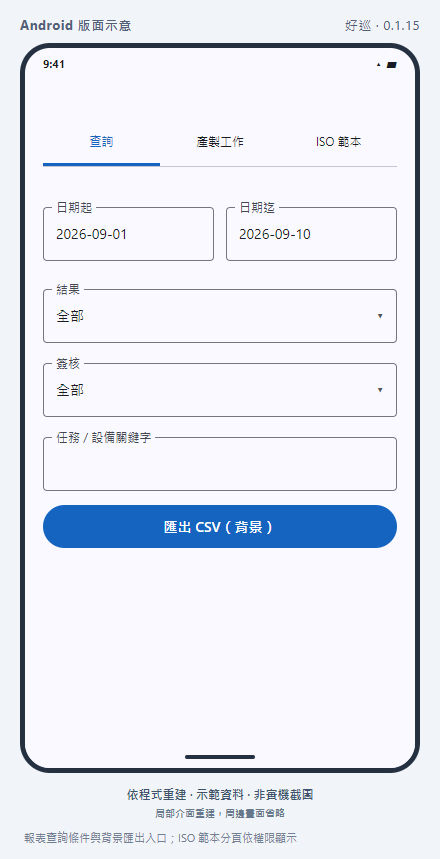
On the "Query" tab, set "Date From, Date To, Result, Approval" and task/equipment keywords, and click "Query". Please note that the assignment date may be different from the assignment date. To cancel a certain date restriction, press and hold "Date From" or "Date To" to clear, and then press "Query".
Click the query result to see the inspection details. If the prompt only displays the first 200 transactions, the complete data needs to be exported using the background.
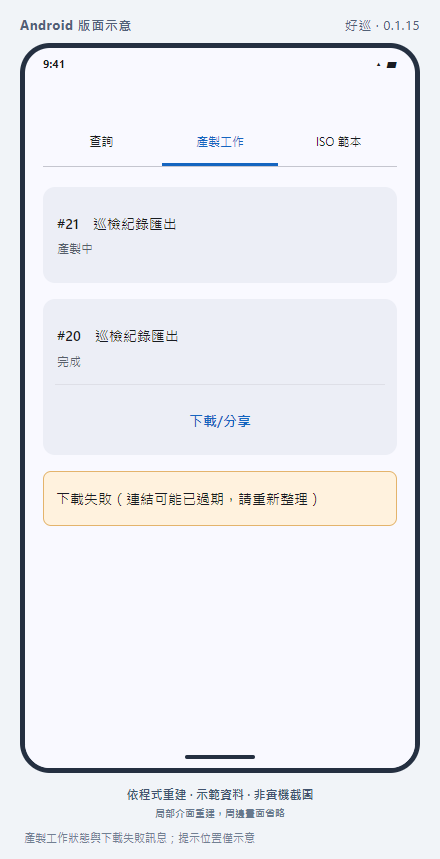
To export the list, click "Export CSV (Background)", write down the production job number, and switch to "Production Job" to view.
After the work shows "Complete", click "Download/Share" and select the save or open method in the sharing window of your phone. If it is still in production, it will be reorganized later.
To output a single PDF, return to "Query", click the "ISO PDF" icon to the right of the item, wait for it to be generated and save it from the sharing window.
How is it completed?
Get the file and open it to check the date, number of transactions or single transaction content.
Operation reminder
The APP's list export is CSV, not .xlsx directly. If the download link fails, reorganize it first; if the export fails or there is insufficient space, follow the prompts and try again.
Simulation diagram · Click on the image to enlargeReport query conditions and background export; ISO template pagination is displayed according to permissionsPicture based on APP 0.1.15+15 · Non-real machine screenshotsImage-by-image consistency check with text version 1.1.9+19 has not yet been completed
Screen guide
Query: date, result, approval, keyword
Production work: Production in progress/Completed/Failed → Download/Share
Right side of single result: ISO PDF
Buttons, prompts and exception handling 4 items
Date/result/approval/keyword
If no data is found, relax the conditions first and check the organization and role; the maximum number of items displayed at a time is 200.
Production work → Download/share
Only completed work can be downloaded; update the status first during production and do not create the same export continuously.
ISO PDF
Single production is different from CSV list; the sharing window is provided by the mobile system.
Long press date from/date to
Long press the date field you want to clear, and "—" will appear in the field. If you need a new date, click to select again, and then click "Search" to update the results.
3.8 What to do when report production or download fails
Enter from hereReport Center → Production Work/Inquiry
First distinguish between production in progress, production failure and download failure to avoid repeated export.
Operation steps
When a job is displayed as being in production, reorganize and check the progress first, and do not create the same job continuously.
When a job fails, write down the job number and error message, check permissions and storage usage, and report to the administrator if necessary.
When it is completed but the download fails, the link may have expired; reorganize the task list and click "Download/Share" again.
When a single ISO PDF generation fails, the date, record and prompts are recorded. Let the manager confirm the production services and permissions; do not change the inspection results to try to repair them.
How is it completed?
The file was successfully opened, or sufficient information was provided for the administrator to trace the cause of the failure.
Operation reminder
If the mobile sharing window is canceled, it does not mean that the work has been deleted. You can go back to the completed work and download it again.
Simulation diagram · Click on the image to enlargeProduction work status and download failure message; the prompt position is only for referencePicture based on APP 0.1.15+15 · Non-real machine screenshotsImage-by-image consistency check with text version 1.1.9+19 has not yet been completed
Screen guide
Job number → In production/Complete/Failed
Done → Download/Share
Download failed → Refresh and try again.
Buttons, prompts and exception handling 2 items
Confirm operation results
The file was successfully opened, or sufficient information was provided for the administrator to trace the cause of the failure.
When prompted
If the mobile sharing window is canceled, it does not mean that the work has been deleted. You can go back to the completed work and download it again.
Recommended sequence: Factory → Member → Release Inspection List → Equipment Category → Equipment → NFC/QR Tag → Distribute. Finally, I will try a round of inspection, sign-off, and remittance. Equipment, labels, and schedules that supervisors can operate are also included in this chapter.
manager
4.1 Create sites, regions and floors
Enter from hereMore → Factory Organization
The site organization uses a tree structure to express the management scope, which also affects equipment ownership and member authorization.
Operation steps
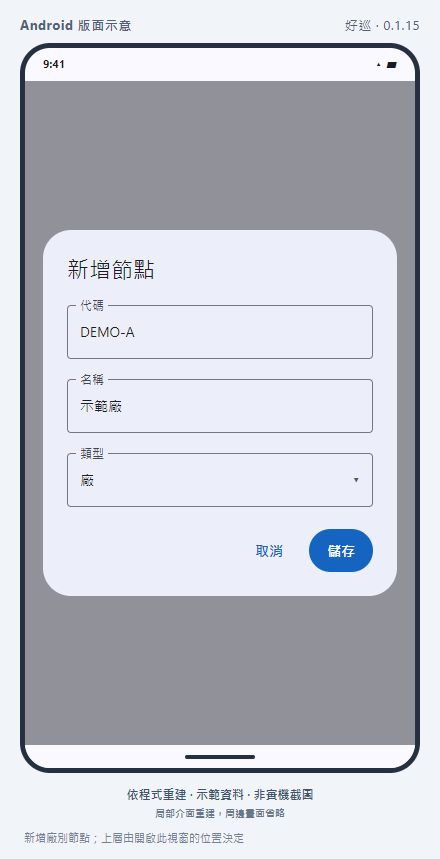
Click "Add Root Node" and fill in the code, name and type. The type can be company, factory, region, floor or district.
Select "Add subnode" in the menu of the upper node and create the required range layer by layer, such as "Factory 1 → Area A → 2nd Floor".
Select "Edit" when you need to change the name; select "Move to..." when you want to change the affiliation, select the new upper level and confirm.
After saving, expand the tree list and check whether the device and the node to be used by the authorization are correct.
How is it completed?
The full management level appears in the list and can be selected in device and role assignments.
Operation reminder
Use "Move to..." on mobile phones to select the upper layer, not drag and move. A node cannot be deleted directly if it has child nodes or devices.
Simulation diagram · Click on the image to enlargeAdd a new site node; the upper level is determined by the location where this window is openedPicture based on APP 0.1.15+15 · Non-real machine screenshotsImage-by-image consistency check with text version 1.1.9+19 has not yet been completed
Screen guide
Add new root node → code, name, type
Node menu → Add child node/Edit/Move to...
Buttons, prompts and exception handling 3 items
Expand/collapse tree nodes
Confirm the upper level location first, and then add sub-nodes.
Move to... → Top
The node can be moved to a position without an upper layer; check the moved layer.
Delete → OK/Cancel
It cannot be deleted when there are child nodes or mounted devices. Check the dependent data first; do not directly delete other data to bypass restrictions.
Application to join and targeted invitation share this entrance; the role and factory must be set during approval or invitation.
Operation steps
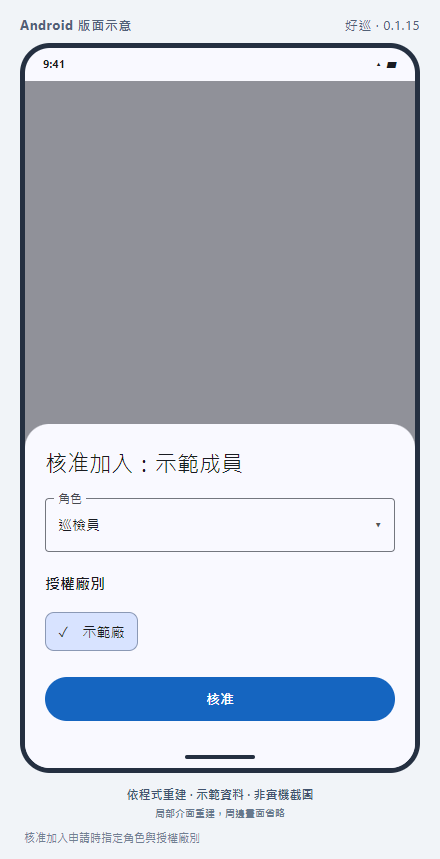
Check the name and account number in "Pending Application", click "Approve", select the inspector or supervisor, check at least one authorized site and confirm.
If the information does not match, click "Return". After confirmation, the other party needs to apply again.
To invite directly, click "Send Invitation", enter the other party's registered email, set the role, factory and validity days, and then send.
Ask the other party to go to "My Organization → Organization Invitation" to accept it. If the invitee or scope is wrong, the invitation that is still to be accepted will be revoked and resent.
How is it completed?
You can join after the application has been approved, or the invitation has been established and accepted by the other party.
Operation reminder
No letters will be sent for targeted invitations. When Email cannot find a registered account, use the add code instead; do not wait for emails repeatedly.
Simulation diagram · Click on the image to enlargeSpecify the role and authorized site when approving the joining applicationPicture based on APP 0.1.15+15 · Non-real machine screenshotsImage-by-image consistency check with text version 1.1.9+19 has not yet been completed
Screen guide
Pending application → Approval/Return
Targeted invitation: Email, role, site, valid days
Buttons, prompts and exception handling 3 items
Approved to join → role, authorized site
Select an inspector or supervisor and select at least one factory, and then confirm.
Return application to join
After confirmation, the other party must reapply; if canceled, it will be kept pending review.
Revoke invitation → Revoke/Cancel
Check the email of the target; the original invitation will be invalid after confirmation.
A person can have multiple roles and different plant scopes. When the supervisor needs to visit the site for inspection, he still has to play the role of inspector.
Operation steps
Search for the account or name, open the member information, modify the required display name and contact information, and then click "Save Basic Information".
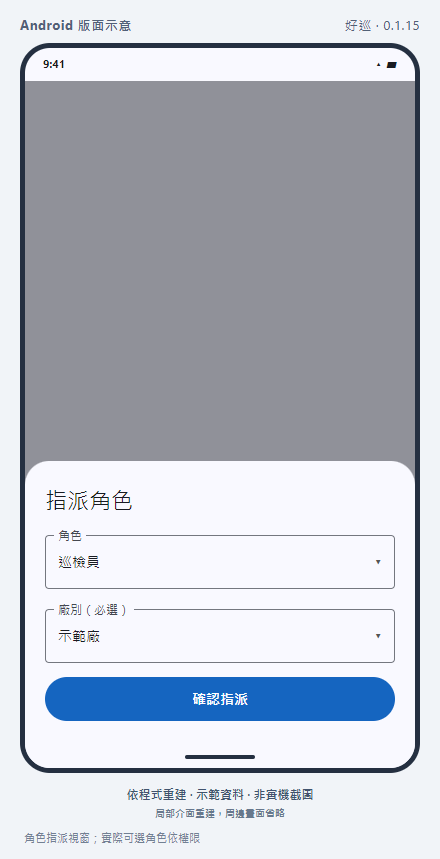
Click "Role Assignment", click "Assign Role", select the role and the required factory, and click "Confirm Assignment".
To remove an authorization, click Release for the role and scope and check the confirmation message.
Account passwords can be reset according to the screen; the email and password of Google/Apple accounts are managed by the login provider.
If the organization allows manual addition of members, you can create a new entry in the list and then set the role; if not, use a join code or directed invitation.
How is it completed?
The role list lists the correct identity and scope, and members can confirm the function after switching organizations again.
Operation reminder
Deactivating, deleting members, and removing roles affects access. Check the target first; "Delete members" is not the same operation as "Delete account" by the user.
Simulation diagram · Click on the image to enlargeRole assignment window; actual selectable roles depend on permissionsPicture based on APP 0.1.15+15 · Non-real machine screenshotsImage-by-image consistency check with text version 1.1.9+19 has not yet been completed
Screen guide
Member basic information → Save basic information
Role Assignment → Role + Site → Confirm Assignment
Buttons, prompts and exception handling 3 items
Role Assignment → Confirm Assignment
Each role and site scope are handled separately; the same member may have multiple authorizations.
Cancel → Confirm/Cancel
After confirmation, members will immediately lose permissions in this scope; it is not equivalent to deleting the entire account.
Save basic information
Basic information and role assignment are operated separately, and the data still needs to be saved after modification.
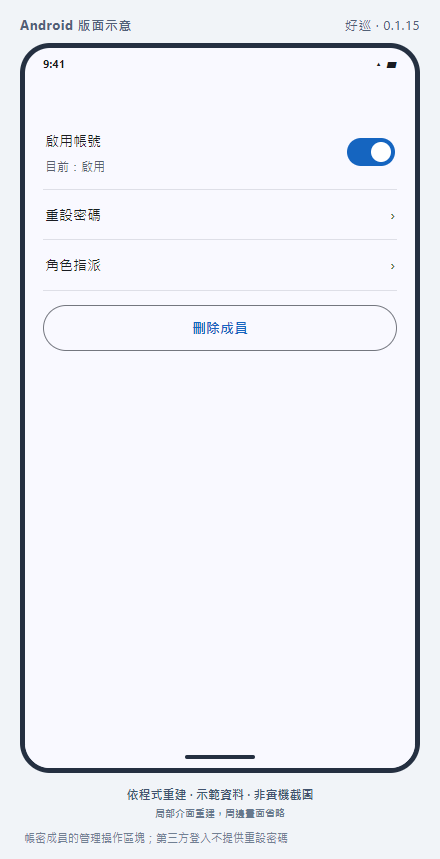
Role cancellation, account deactivation and member deletion are different operations. First confirm which level you need to adjust.
Operation steps
Search the account or name in the member list, open the person to be processed, and verify the identity.
Switch "Enable Account" to deactivate or restore; this switch directly saves the status and confirms the prompt and current status.
To reset the password of the account, click "Reset Password", enter a new password that meets the requirements and confirm; third-party login does not provide this operation.
When you are sure you need to delete a member, click "Delete Member", read the confirmation window and then click "OK"; when completed, return to the list and check again.
How is it completed?
The correct member's status has been updated, and the necessary roles and handoffs have been confirmed.
Operation reminder
The "Delete Member" screen is marked as soft deletion, which does not mean that the user has applied for permanent deletion of the personal account, nor can it be understood as deleting the historical inspection.
Simulation diagram · Click on the image to enlargeManagement operation block for account members; third-party login does not provide password resetPicture based on APP 0.1.15+15 · Non-real machine screenshotsImage-by-image consistency check with text version 1.1.9+19 has not yet been completed
Screen guide
Basic information → Activate account (current status)
Reset password → New password → OK/Cancel
Delete member → confirmation window
Buttons, prompts and exception handling 2 items
Confirm operation results
The correct member's status has been updated, and the necessary roles and handoffs have been confirmed.
When prompted
The "Delete Member" screen is marked as soft deletion, which does not mean that the user has applied for permanent deletion of the personal account, nor can it be understood as deleting the historical inspection.
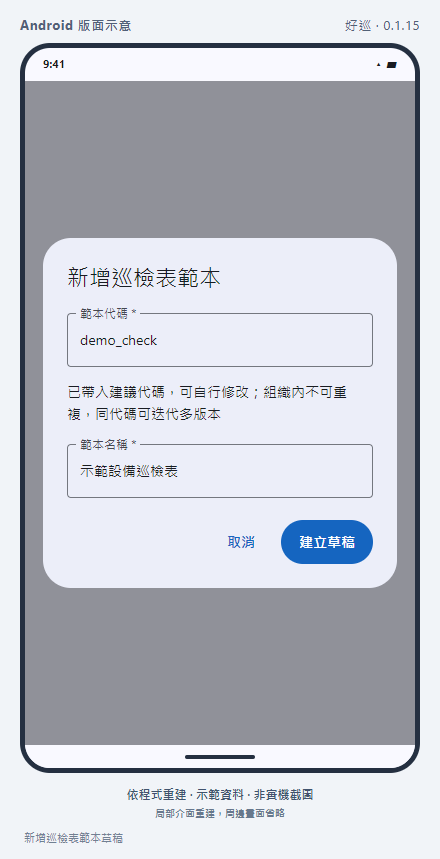
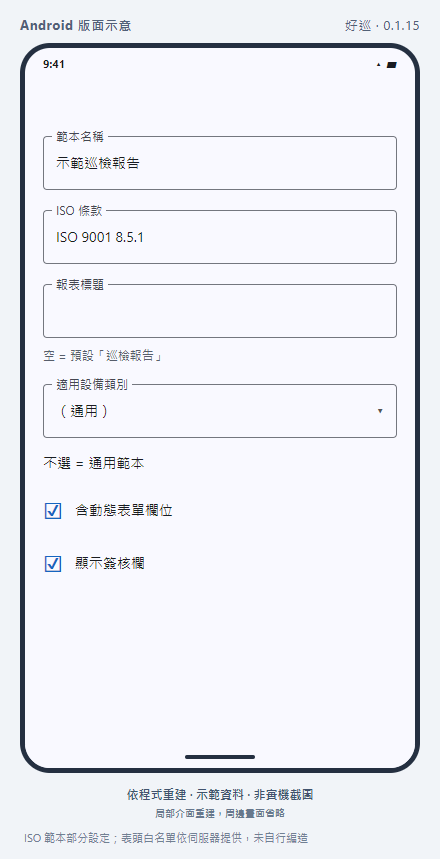
Enter from hereMore → Inspection Form Template → New Template
The template determines which items need to be filled in on site. It must be published first before the device category can select it as an inspection form.
Operation steps
Click "Add Template", check the suggested template code, enter a recognizable name, and click "Create Draft".
Enter "Edit Field", click "Add Field", fill in the field code and name, and select value, radio selection, check box, text, photo or date.
Set it as required and set the value range, text length or number of photos as needed; in the optional field, add the value and display text of each option.
When a condition field is required, set the basis field, condition and comparison value; for example, customize "Appearance Inspection" to select exceptions to display instructions. Follow the complete example settings in the next section, and then use the up and down movement buttons to adjust the order.
Click "Save Field", return to the template list and select "Publish", read the version prompts and confirm.
How is it completed?
The template shows the enabled status, and the device category can select this form.
Operation reminder
Although the APP currently lists the "Signature" field type, the handwritten signature operation has not yet been completed. Do not make this field required; supervisor approval/reject functionality is not restricted by this.
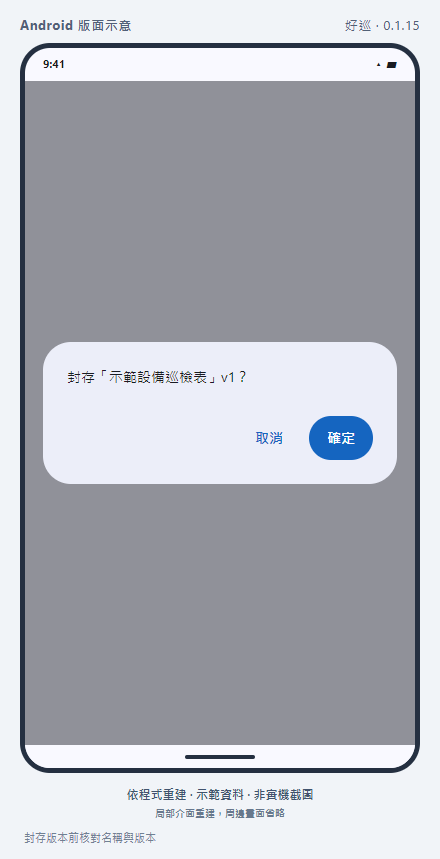
Simulation diagram · Click on the image to enlargeAdded a draft inspection form templatePicture based on APP 0.1.15+15 · Non-real machine screenshotsImage-by-image consistency check with text version 1.1.9+19 has not yet been completed
Screen guide
Add template → Create draft
Edit Field → Save Field → Publish
Buttons, prompts and exception handling 5 items
Column column
Draft clicks can be edited; active and archived versions can only be viewed.
up/down arrow
Adjust the column order; the first column cannot be moved up, and the last column cannot be moved down.
Field delete icon
Immediately removes from the draft edit list without a second confirmation; changes are saved by pressing the Save field.
Not saved yet. Are you sure you want to leave?
Select "Stay" to go back and save; select "Discard changes and leave" to discard unsaved changes.
Publish → Confirm/Cancel
Check the name and version; it cannot be modified after publishing, and the old version of the same code will be archived.
4.6 Example: Display description only when exception is selected
Enter from hereInspection form template → Draft → Edit field
Use a set of fillable examples to distinguish between "stored option values" and "text displayed on the screen".
Operation steps
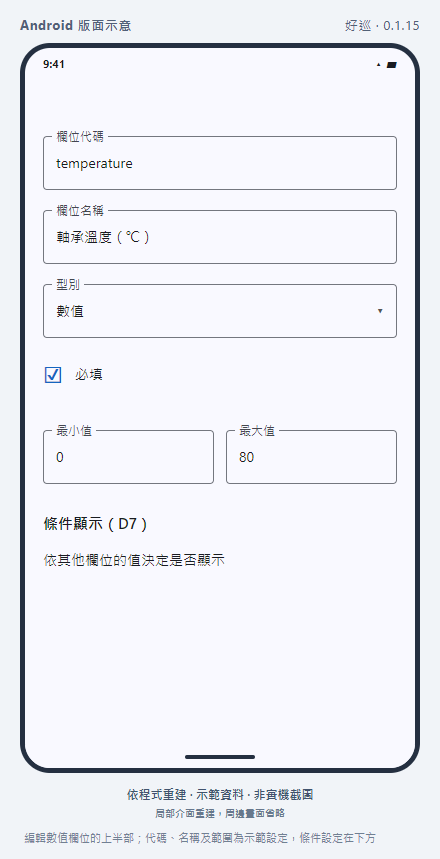
Add a new radio field, fill in appearance for the code, and fill in "Appearance Check" for the name. Add two options: value ok/display text "normal"; value issue/display text "abnormal". Confirm the new field.
Add a new text field, fill in appearance_note for the code, and fill in "Appearance Abnormality Description" for the name. Set it as required according to work requirements.
Turn on the condition setting of this text field, select appearance according to the field, select "equal" for the condition, and fill in issue for the comparison value; instead of filling in the display text "abnormal". After confirmation, click "Save Field".
After the equipment is released and confirmed to use this template, it is used to test the inspection: no instructions will be displayed when the appearance inspection is normal; instructions will be displayed when abnormal is selected. When set to required, it must be filled in before sending.
How is it completed?
The display results of both answers are as expected, and the required checks are also in line with the settings.
Operation reminder
This is a custom form field and is different from the "Normal/Abnormal/N/A" inspection results at the top of the page. The field code must start with a lowercase letter, and can be followed by lowercase letters and underscores, and cannot be repeated.
Simulation diagram · Click on the image to enlargeEdit the upper half of the value field; the code, name, and range are sample settings, and the condition settings are belowPicture based on APP 0.1.15+15 · Non-real machine screenshotsImage-by-image consistency check with text version 1.1.9+19 has not yet been completed
Screen guide
Appearance inspection appearance: ok → normal; issue → abnormal
Appearance exception description appearance_note: displayed when appearance is equal to issue
Buttons, prompts and exception handling 3 items
Add options → value, display text → add
The screen text and the stored value are separated, and both must be filled in.
Conditional display
Supports equal, not equal and value conditions; the field must already exist.
Duplicate field codes/insufficient options
Fix the code or add at least one option before confirming the field.
4.7 Modify the form: Create a new version and publish it again
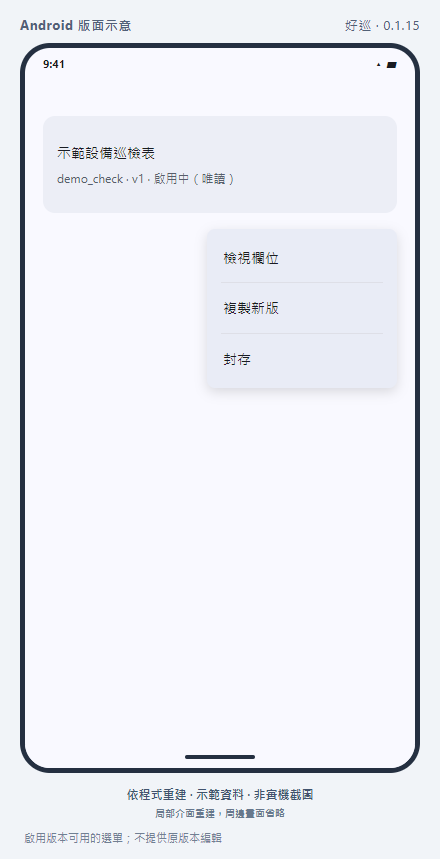
Enter from hereInspection list template → Active template menu → Copy new version
Published and archived templates are read-only; modifications should be made with the new version.
Operation steps
Find the active template you want to adjust and select "Copy new version".
Open a new draft field, modify the content and "Save Field".
A new version will be released after verification; the confirmation prompt will indicate that the old version of the same code will be archived.
Check the form settings of the device category and individual devices, and actually enable the test inspection to confirm the new fields before starting to use them.
How is it completed?
New inspections are loaded into the expected form, and existing records can still be reviewed.
Operation reminder
Don't just publish and assume that all devices have adopted the new fields; devices may have specific forms specified. Before deactivating, confirm whether there are still device dependencies.
Simulation diagram · Click on the image to enlargeEnables the menu available for versions; editing of the original version is not availablePicture based on APP 0.1.15+15 · Non-real machine screenshotsImage-by-image consistency check with text version 1.1.9+19 has not yet been completed
Screen guide
Draft: editable
Active/Archived: Read only
Copy new version → Modify → Publish
Buttons, prompts and exception handling 2 items
Copy new version
Create a modifiable draft instead of directly modifying the published version.
View field
Current restrictions and conditions can be checked; editing controls will not appear in read-only status.
Enter from hereInspection form template → ⋯ of this template → Save
Archiving and creating a new version are different operations; first confirm which devices still use this template.
Operation steps
Check the template name, version and status. First check the device category and form settings of individual devices, and arrange the necessary replacement templates.
Open the template menu and click "Save", confirm that the name and version in the window are correct and then confirm. This option is no longer available for archived projects.
Confirm that the list status changes to Archived; when opening the field, it is read-only.
Check the available inspection schedules for the affected devices, and do not assume that archiving will automatically replace the schedules for all devices.
How is it completed?
The target version has been archived, and the device still has applicable forms for subsequent inspections.
Operation reminder
If an error occurs after pressing the button, handle it with the on-screen message; do not think of "save" as deleting historical inspection records.
Simulation diagram · Click on the image to enlargeCheck the name and version before archiving the versionPicture based on APP 0.1.15+15 · Non-real machine screenshotsImage-by-image consistency check with text version 1.1.9+19 has not yet been completed
Screen guide
Template name/version/status
⋯ → Archive → Check name version → Confirm
Archived → View field (read-only)
Buttons, prompts and exception handling 1 item
Archive → OK/Cancel
Draft or live versions can be archived if access is provided, but archived versions do not have this option.
Enter from hereMore → Equipment Category; More → Equipment Query
Default forms are set for device categories, and specific forms can be used for individual devices. When there is no form available, the inspector cannot fill it out.
Operation steps
The administrator first opens "Equipment Category → Add Category", fills in the code and name, selects the published inspection form and saves it.
Open "Device Query → Add Device", select the factory and device category, and fill in the device number, device name, location and status.
Confirm that the "Inspection Form" should inherit the category default, or select a template specific to this device and save it.
Search for a new device and open "Device Details" to check the data. When you need the device to recognize a photo, you can take a photo from the details or select an album to upload.
Then set the NFC or QR tag according to the site plan and try again to see if the inspection form can be loaded normally.
How is it completed?
The equipment can be found, the factory type and form are correct, and there is no "No inspection form available" prompt.
Operation reminder
Equipment photos are used to identify the equipment, while inspection photos are used to record the scene. The two have different purposes. Categories with devices cannot be deleted directly.
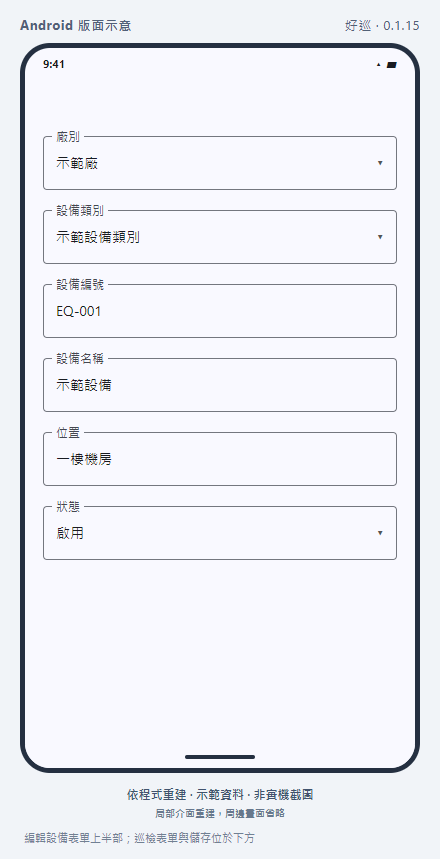
Simulation diagram · Click on the image to enlargeThe upper part of the editing device form; the inspection form and storage are located belowPicture based on APP 0.1.15+15 · Non-real machine screenshotsImage-by-image consistency check with text version 1.1.9+19 has not yet been completed
Screen guide
Category: code, name, inspection form
Equipment: factory, category, number, name, location, status
Form: Inherit category default/Device-specific
Buttons, prompts and exception handling 3 items
Device Details → Edit → Save Changes
Check the equipment number before modification; the name, factory, and category are necessary information.
Activating/deactivating/under maintenance/scrap
Select based on actual equipment status; scrapping status should not be used as a substitute for completing inspections.
No inspection form available
Set up category defaults or device-specific forms first, and then test the inspection portal.
4.10 Edit, deactivate and delete device categories
Enter from hereMore → Equipment categories
The category will provide a preset inspection list for the equipment. Check which equipment inherits it before making changes.
Operation steps
Select "Edit" of the category, check the category code, name and inspection form, and click "Save" when completed.
When you need to adjust the category status, use the enable or disable provided by the list menu to reconfirm the status.
To delete, select "Delete", check the category name and confirm. It cannot be deleted when there are devices under the category.
After modifying the default form, check the inherited categories and devices with dedicated forms respectively, and then arrange subsequent inspections.
How is it completed?
The category status and default form are correct, and the affected devices can be used normally.
Operation reminder
If there is no published template, the template will be published first; if the form option fails to load, it will be reloaded first, and it will not be inferred that the original settings have been deleted due to blank space.
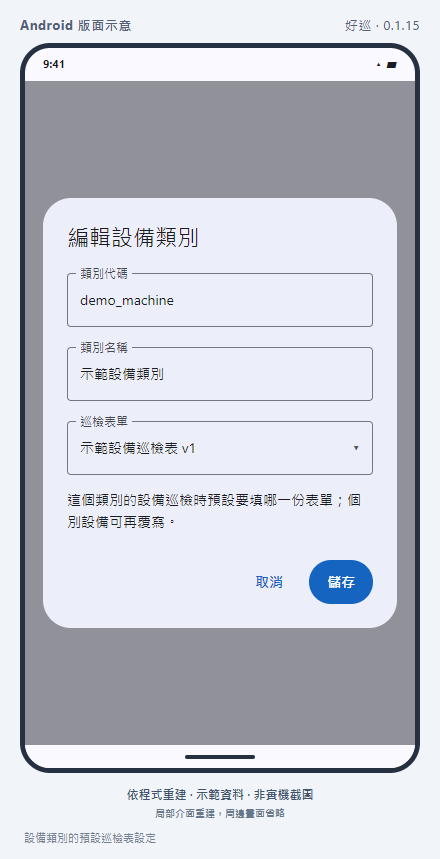
Simulation diagram · Click on the image to enlargeDefault inspection list settings for equipment categoriesPicture based on APP 0.1.15+15 · Non-real machine screenshotsImage-by-image consistency check with text version 1.1.9+19 has not yet been completed
Screen guide
Category column → Status/Number of devices/Default form
⋯ → Edit/Activate or Deactivate/Delete
Deletion confirmation: Cannot delete when device is present
Buttons, prompts and exception handling 2 items
Confirm operation results
The category status and default form are correct, and the affected devices can be used normally.
When prompted
If there is no published template, the template will be published first; if the form option fails to load, it will be reloaded first, and it will not be inferred that the original settings have been deleted due to blank space.
Enter from hereEquipment Inquiry → Equipment Details → Photos
The photos here are used to identify equipment and are managed separately from the photos submitted for each inspection.
Operation steps
Search for and open the device, check the device number and name, and then view the photo area.
Click the photo thumbnail that can be displayed normally to open the large image; use two fingers to spread or pinch to zoom in or out. After zooming in, you can drag to view details. After reading the picture, click on the blank space outside the picture window to return to the device details; there is no close button for the large picture.
When you need to add a new photo, use the photo or album entrance. After selecting the photo, wait for it to be uploaded and confirmed to be displayed.
To remove unnecessary device photos, click the The × on the thumbnail is to delete the entry, not to close the large image.
If the photo shows a lock, it means that the original image cannot be viewed at the moment, but it does not mean that it has been deleted. Those with editing permissions can still press the × in the upper right corner of the lock and delete it after confirmation. When you can't see the original image and cannot identify it, check the photo first and don't delete it just to unlock it.
Confirm that the photo list is updated after the operation is completed. If the upload or deletion fails, read the error message, reopen the device details confirmation list, and then decide whether to try again; don't assume success just because you pressed the button.
How is it completed?
Photos of the correct equipment have been updated to retain the required identification images.
Operation reminder
Before deleting, confirm whether you need to save it separately. On-site photos in the inspection record should be viewed in the record and cannot be replaced by the equipment photos here.
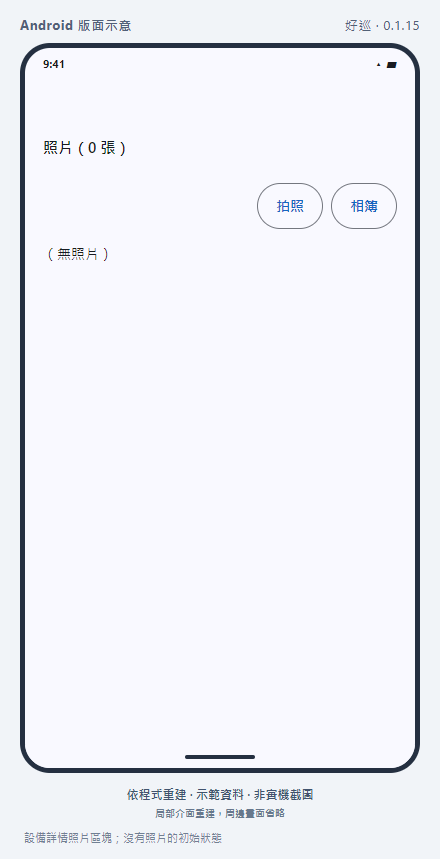
Simulation diagram · Click on the image to enlargeDevice details photo block; initial state without photoPicture based on APP 0.1.15+15 · Non-real machine screenshotsImage-by-image consistency check with text version 1.1.9+19 has not yet been completed
Screen guide
Equipment details → Check number and name
Photo thumbnail → Large image → Two-finger zoom/drag → Click on the blank space of the mask to close
Photo area: photo/album; × in the upper right corner of the thumbnail is the deletion entrance
General photo or lock placeholder → × → Cancel/Delete → Checklist
Buttons, prompts and exception handling 7 items
Photo thumbnail → enlarge view
For photos that are displayed normally, you can click to enlarge the image, use two fingers to zoom in, and then drag to zoom in; currently, you can zoom in up to 8 times.
Close large image
Click on the masked space outside the picture window to return to the device details; there is no close button for the large picture.
Upper right corner of thumbnail × → Delete/Cancel
× Deletion confirmation will be turned on, not direct deletion. Select Unkeep Photos and select Post-Delete Checklist.
Lock photo
The lock placeholder cannot be used as a normal photo to enlarge the image; those with editing permissions can still use the × in the upper right corner to delete, subject to the same confirmation.
There is no photo, album or deletion entry
These operations require editing permissions; being able to view the device does not mean that you can manage photos. Please check the current identity and authorization as an administrator.
Photos deselected/failed to upload
Deselecting photos or albums will not add new photos. If there is a selection or upload error, follow the prompts and confirm the photo list again.
Broken image icon/Deletion failed
A broken picture means that the picture failed to load, which does not mean that the photo has been locked or deleted; first confirm the connection and then reopen the device details. If the deletion fails, keep the error message and check the list before processing.
Enter from hereMore → NFC tag test/tag binding/inspection tag
NFC tags should be tested for mobile phone compatibility first; QR tags can scan existing image codes, or be generated by the system and then shared and printed. Both tags must be bound to the device correctly, and only one inspection tag can be bound to the same device.
Operation steps
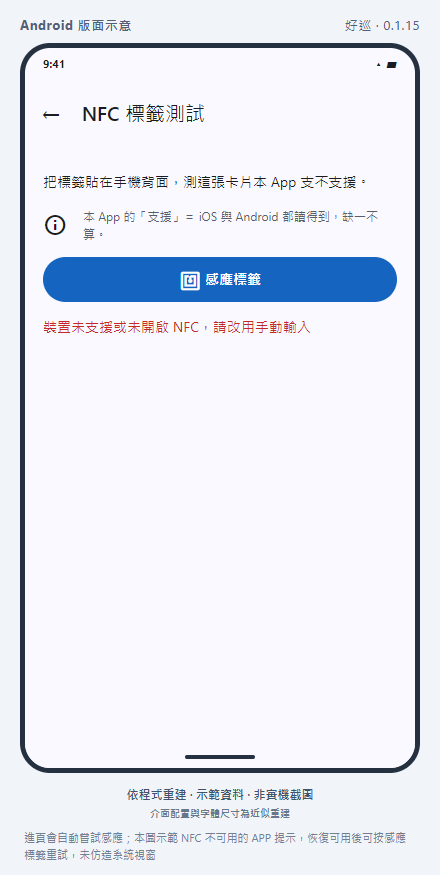
After turning on "NFC Tag Test", the APP will automatically try to sense, just bring the tag close to the phone without having to press it again. After getting the result, check the tag type, UID and platform support, and then click "Sense again" to compare whether the UID is consistent. If it shows that NFC is not available, first confirm that the device supports and enable NFC, and then press "Sensor Tag" to try again; when using it cross-platform, you need to check the same card with actual Android and iPhone.
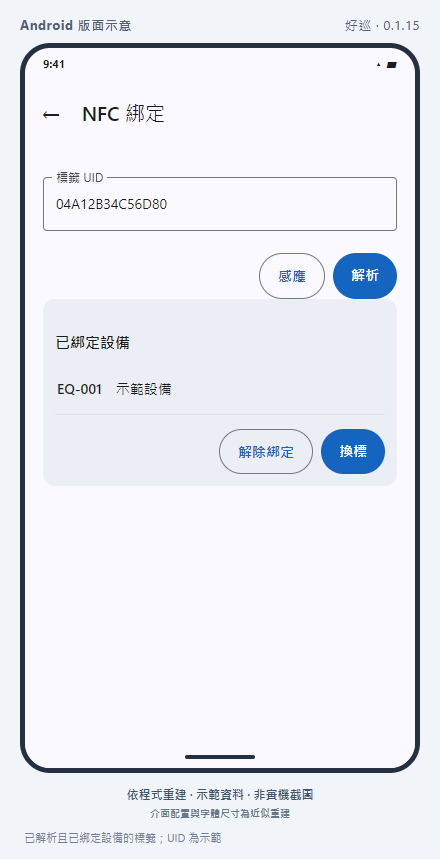
Go to "Tag Binding" and select NFC or QR. For NFC, press "Induction NFC" to read the UID; for QR, press "Scan QR" to read the existing image code. You can also enter the confirmed NFC UID or QR content on the management screen and click "Analyze".
When it is not bound, click "Bind to device" to search for the unbound device and select it; you can also "add a device and bind it". After successful confirmation, check the bound device name.
If there is no existing QR, select the QR first, then click "System generates QR and bind" to select the device. After success, you can share the displayed QR tag as an image, then print it properly and paste it to the corresponding device.
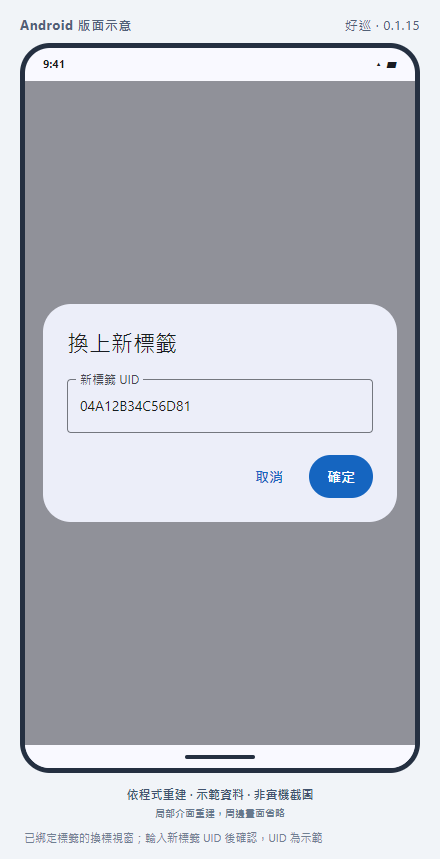
To change to a new label, first parse the old label, select "Change Label" in the bound device area, and then select sensor NFC, scan QR, system-generated QR, or enter manually. Verify the new label with the device when completed, don't just replace the physical sticker.
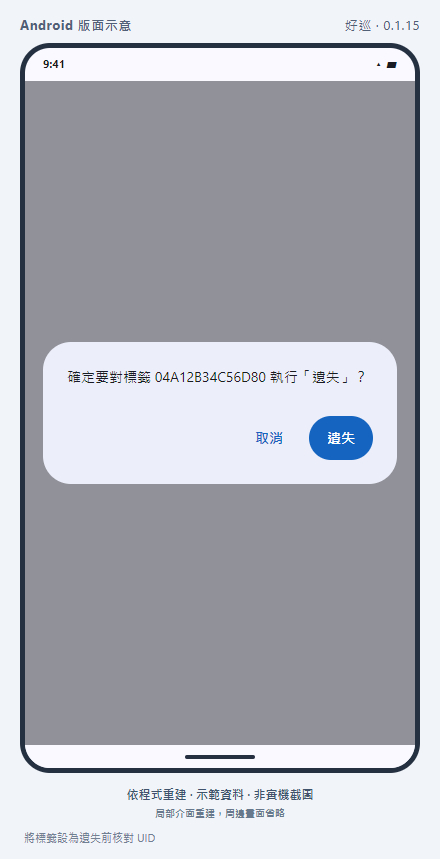
"Tag Inspection" can search UID, QR code or device to view unbound, bound, disabled or lost; if necessary, select allowed status changes from the tag operation screen. Unbinding is handled separately in "Tag Binding".
How is it completed?
The correct device can be identified when scanning with an NFC sensor or QR camera on site, and the status of the old and new tags is as expected.
Operation reminder
Just because an Android can read it, it doesn't mean that an iPhone can also use the same NFC card; please use your on-site mobile phone to verify compatibility. For QR labels, it is necessary to confirm that the image code is complete, the printing is clear, and the lighting and installation position are suitable for camera scanning.
Simulation diagram · Click on the image to enlargeLabel of the parsed and bound device; UID is a demonstrationPicture based on APP 0.1.15+15 · Non-real machine screenshotsImage-by-image consistency check with text version 1.1.9+19 has not yet been completed
More operation screens (2 states)
Simulation diagram · Click on the image to enlargeThe sensor will be automatically tried when entering the page; this picture demonstrates the APP prompt when NFC is unavailable. After it is restored, you can press the sensor label to try again. The system window is not faked.Picture based on APP 0.1.15+15 · Non-real machine screenshotsImage-by-image consistency check with text version 1.1.9+19 has not yet been completedSimulation diagram · Click on the image to enlargeLabel change window for a bound label; enter the new label UID and confirm. The UID is a demonstrationPicture based on APP 0.1.15+15 · Non-real machine screenshotsImage-by-image consistency check with text version 1.1.9+19 has not yet been completed
Screen guide
Tag testing → UID, platform support
Tag binding → NFC/QR → Parse or system generate QR
Bound → Unbind/Relabel
Inspection label → Single print/export QR PDF
Buttons, prompts and exception handling 5 items
parse
Use the current NFC UID or QR content to query; before entering, sensing or scanning, get the correct tag data first.
The system generates QR and binds it
Select a device that has not yet been bound and create a QR tag; if successful, share or save the image first, and then check the device name.
Unbind → OK/Cancel
After confirmation, the tag is disassociated from the device, and then the status is checked.
Change label → New label UID → OK
You can choose to sensor NFC, scan QR, system-generated QR or enter manually; cancel without change.
No device to bind
All may be bound or not within the authorization scope; check the search and range, or use a new device and bind it.
NFC shares inventory and state management with QR tags. First confirm the tag type, UID/QR code and bound device, and then process the status; restoration and label change are not the same.
Operation steps
Search for UID, QR code, device number or name, switching between All, Unbound, Bound, Disabled and Missing filters if necessary.
Open the label operation menu and use the currently provided "Deactivate, Lose, Restore" options. Available actions may differ for each label.
Check the UID and action in the confirmation window and click the action to confirm; if it is incorrect, cancel.
QR tags can be used to share a single image by clicking "Print" from the operation menu; "Export QR PDF" at the top of the page will filter and export all qualified QR tags based on the current search and status. NFC tags will not be included in the PDF.
Reorganize and check the new status; if you want to change to another entity label, go to "Label Binding" and use the label change.
How is it completed?
The status of the tag list conforms to the on-site conditions, and the device and NFC UID/QR code correspond correctly; the required QR image or PDF can be shared normally.
Operation reminder
When an action is not provided, other states cannot be forcibly applied; first confirm the current state and permissions. Printing or exporting QR only generates label files, which does not mean that on-site scanning has been completed.
Simulation diagram · Click on the image to enlargeSet tag to check before missing UIDPicture based on APP 0.1.15+15 · Non-real machine screenshotsImage-by-image consistency check with text version 1.1.9+19 has not yet been completed
Screen guide
Search UID/QR code/device → Status filter
Tag operations → Deactivate/Lost/Restore (according to available actions)
QR Tag → Print/Export QR PDF
Check UID and action → Confirm
Buttons, prompts and exception handling 3 items
Confirm operation results
The status of the tag list conforms to the on-site conditions, and the device corresponds correctly to the NFC UID/QR code.
Print/Export QR PDF
Single printing will share the current QR tag image; PDF will filter and export qualified QR tags based on the current search and status.
When prompted
When an action is not provided, other states cannot be forcibly applied; first confirm the current state and permissions.
4.14 Establish cycle schedule and confirm distribution date
Enter from hereMore → Schedule Distribution → Scheduling Rules
Scheduling is used to dispatch tasks repeatedly; after establishing the rules, you still need to confirm the preview and actual tasks.
Operation steps
Click "Add Schedule", fill in the schedule name, target type and distribution target, and select according to the target options provided on the screen.
Set the period: every N days every day, a specified week every week, a specified date every month, a specified month and day every year, working days, weekends or customized dates. You can choose "end of month" every month.
Fill in the "Completion period (N minutes after distribution)"; for example, 480 means 8 hours. Select the dispatch object, effective start and end, and activation status, and then click "Create Schedule".
Go back to the list and select "Next Distribution Preview" to check the date; if there is no preview, check the cycle and effective interval.
Switch to the "Calendar" to check the dispatch, holiday/factory break and make-up work marks; after dispatch, go to the "Task Overview" to check the actual assignee, inspection point and deadline.
How is it completed?
The preview date meets the company's needs, and expected tasks can be found on the distribution date.
Operation reminder
The basic definition of "working days" is Monday to Friday. Exceptions must be set for special holidays or make-up shifts. Deleting a schedule will not delete dispatched tasks.
Simulation diagram · Click on the image to enlargePeriod setting block of weekly schedule; deadline, object, and effective interval are belowPicture based on APP 0.1.15+15 · Non-real machine screenshotsImage-by-image consistency check with text version 1.1.9+19 has not yet been completed
4.15 Modify, deactivate, restore and delete schedules
Enter from hereScheduled dispatch → Rule list → Scheduled ⋯
Once created, the schedule still needs to be maintained; use Deactivate to pause, and Edit to change the rules.
Operation steps
Find the schedule and check the name. Click the whole column or menu "Edit" to adjust the required goal, cycle, deadline, effective interval or dispatch object, and then save.
To pause, select "Deactivate" from the schedule menu and confirm the success message and deactivation status; if you need to resume, select "Enable" and check the next distribution preview.
Select "Delete" when you are sure you no longer want to keep the rule, check the schedule name in the confirmation window and decide whether to confirm. Screen prompt: Already dispatched tasks will not be affected.
Go back to the list to reorganize the confirmation status; also go to the task overview to check whether the dispatched tasks still need to be reassigned or otherwise processed.
How is it completed?
The rule status is as expected and the preview of the enabled schedule is correct.
Operation reminder
Deactivation will send the status change directly; don't assume that there must be a second confirmation. After modifying the rules, you must also check the assigned tasks.
Simulation diagram · Click on the image to enlargeDelete the confirmation content of the schedule; dispatched tasks will not be affectedPicture based on APP 0.1.15+15 · Non-real machine screenshotsImage-by-image consistency check with text version 1.1.9+19 has not yet been completed
Screen guide
⋯ → Edit/Next Distribution Preview/Enable or Disable/Delete
Deactivate → check status; restore → check preview again
Delete → Check schedule name and existing task prompts
Buttons, prompts and exception handling 2 items
enable/disable
Change status directly and check off the list when completed.
Delete → Delete/Cancel
The confirmation window indicates that dispatched tasks are not affected.
4.16 Set holidays, factory breaks and make-up shifts
Enter from hereScheduled delivery → Exception day
Exception days supplement special working days that cannot be expressed in the general cycle.
Operation steps
Click "Add Exception Day", select the date, and fill in the name, such as "year-round study" or "make-up class."
Select the type "National holidays, factory holidays, make-up shifts" and specify the applicable sites; unselect a site to indicate all sites.
After adding it, go back to the calendar to check the mark, and then open the "Next Distribution Preview" of the affected schedule.
If the preview is different from expectations, first correct the settings and ask the administrator to confirm the rules. Do not assume that the task must have changed just because an exception day has been added.
To remove the created exception day, click the delete icon in this column, check the date and name and confirm. Recheck the calendar and distribution preview of the affected schedule to confirm the correction.
How is it completed?
The preview of the affected schedule meets the needs of holidays, factory breaks, or make-up shifts.
Operation reminder
How the exception days affect various cycles must be checked with actual preview; this manual does not write unchecked make-up shift combinations as fixed behaviors.
Simulation diagram · Click on the image to enlargeAdded exception days; dates and year names are for demonstration purposes only and are not actual holiday information.Picture based on APP 0.1.15+15 · Non-real machine screenshotsImage-by-image consistency check with text version 1.1.9+19 has not yet been completed
Screen guide
Date, name, type, applicable site
Add → Calendar → Preview of next distribution
Buttons, prompts and exception handling 3 items
Months before and after the monthly calendar
Switch months to see date markers; check separately from the month's to-do list.
Add exception day
The date, name, type and site are checked and added; a blank site represents all.
Delete → Delete/Cancel
Confirm the date and name, delete it and then view the calendar and preview again.
Preview the data before importing it, and then confirm the writing; do not omit checking the error column.
Operation steps
Select the data to be imported according to the types provided on the page. Please follow the on-screen guidance to download the CSV template from the Web "Data Import"; if the Web is not enabled, please contact the administrator to obtain the correct template.
Fill in the data using UTF-8 CSV, delete the sample data in column 2 of the template, and save it.
Click "Select CSV and Preview" to check the total number of columns, valid columns, and error columns; the preview details only show the first 100 columns.
File preview can be re-selected after fixing the error. If you decide to import only valid rows, click "Confirm Import" to check the number of transactions and ignore the error row prompts.
After importing, check the success and failure details. If a member password is generated, properly record it and give it to the person before leaving the page. It is required to update it after logging in for the first time.
How is it completed?
The number of successful transactions is in line with expectations, and the information can be checked in the corresponding equipment or member list.
Operation reminder
The results may be partially successful. Confirm the imported items before retrying to avoid re-importing the entire file.
Simulation diagram · Click on the image to enlargeConfirm to import valid columns after CSV preview; erroneous columns will be ignoredPicture based on APP 0.1.15+15 · Non-real machine screenshotsImage-by-image consistency check with text version 1.1.9+19 has not yet been completed
Screen guide
Data type → Select CSV and preview
Valid/Error → Confirm Import → Import Details
Buttons, prompts and exception handling 4 items
Category selection/Select CSV and preview
Preview again after changing the type or file, and the previous number of pens will not be used.
Confirm import → Confirm import/cancel
The window explains the number of valid transactions and the skipped error column, and is written after confirmation.
No types to import/try again
Reload; report permissions or settings if still not provided, do not change CSV format guess by yourself.
System generated password
Recorded before leaving the page, and cannot be retrieved from this results page later.
Enter from hereMore → Report Center → ISO Template
The ISO template adjusts the report title and presentation fields, and is not an inspection form template for on-site filling.
Operation steps
Click "New Template" and enter the name, ISO terms and report title.
Select the applicable equipment category; uncheck to indicate a general template.
Check the required header fields, whether to include dynamic form fields and whether to display the approval bar, and save.
Go back to "Query" to select a record of the applicable device, generate ISO PDF and open the verification page.
How is it completed?
Test that the title, fields, and approval information of the PDF meet the requirements.
Operation reminder
When there is no customized ISO template, the built-in default layout will be used; supervisors will not see the tab for managing templates.
Simulation diagram · Click on the image to enlargePartial settings of the ISO template; the header whitelist is provided by the server and is not compiled by oneself.Picture based on APP 0.1.15+15 · Non-real machine screenshotsImage-by-image consistency check with text version 1.1.9+19 has not yet been completed
Screen guide
ISO Template → New Template
Name, terms, title, equipment category, header and approval column
Buttons, prompts and exception handling 4 items
Edit → Save/Cancel
Click the column or menu to edit; leave the title blank to use the default inspection report.
enable/disable
Make changes directly in the template menu and check the status.
Delete
Currently, click to execute directly without secondary confirmation; check the template before operation.
No ISO template
The report uses the built-in default layout, so it does not mean that the report cannot be generated.
4.19 Notification rules, system parameters and operation records
Enter from hereMore → System Management
Notification rules determine which events should be notified to whom; APP push is also affected by device notification settings.
Operation steps
Go to "Notification Rules → Add Rule" and select inspection sending, inspection return or abnormal reporting events.
Select Email, site or push channel, then select the role, factory role, designated member or event party; fill in the roles/members required on the screen and add them.
To disable a certain notification, first check the rule and then follow the screen operation; after deleting it, events that match the rule will no longer be sent accordingly.
"System Parameters" only adjusts settings for which the purpose is understood. Click "Save All Settings" to confirm success; if one item is invalid, the entire batch may not be saved.
When you need to trace changes or login issues, go to "Operation Records" or "Login Records" and follow the search bar prompts to find relevant events and times.
How is it completed?
Rules and settings are saved; expected notifications and records are confirmed as a normal business operation.
Operation reminder
Don’t just rely on push notifications to arrange work; if you haven’t received it, you should also directly check the APP’s to-do list. Device rejection notifications and inconsistent recipients may affect reception.
Simulation diagram · Click on the image to enlargeAdded notification rules for abnormal reportsPicture based on APP 0.1.15+15 · Non-real machine screenshotsImage-by-image consistency check with text version 1.1.9+19 has not yet been completed
Screen guide
Notification rules/system parameters/operation records/login records
Buttons, prompts and exception handling 3 items
Notification Rules → Delete → OK/Cancel
After confirmation, stop sending according to this rule; first check the event, channel and recipient.
Save all settings
If any item is invalid, the entire batch will not be written and needs to be corrected and saved again.
Operation history/login history → Search
The former searches by operator or data table, and the latter searches by account or IP.
The people who build the organization have an ownership relationship. Organization settings, ownership, and shared space usage are handled by the owner.
organization owner
5.1 Create an organization, set time zone and add codes
Enter from hereMy organization → Create organization; Current organization "⋯" → Organization settings
If you already have a company organization, you should apply to join it and do not create another organization with the same name.
Operation steps
When you are sure you want to create a new organization, click "Create Organization", fill in the name and click "Create". Save the joining code displayed successfully.
Switch to this organization and open "Organization Settings" in the menu on the right of the current organization; ordinary members will not see this entrance.
Check or modify the organization name, time zone, and task deadlines. The organization's time zone affects the determination and scheduling of "today"; when no default deadline is set, the screen description indicates the end of the local day.
View the QR in "Join Code" or click "Copy Code" and provide it to colleagues who want to join. If you need to invalidate the old code, click "Reproduce code" and confirm, then provide a new code.
How is it completed?
The organization name, time zone and default deadline are correct, and members can apply to join with a valid code.
Operation reminder
After re-production, the old joining code will become invalid immediately. "Allow web page login" is the activation status information, and this page of the APP does not provide self-activation.
Simulation diagram · Click on the image to enlargeOrganization name modification confirmation; time zone and deadline have separate entrancesPicture based on APP 0.1.15+15 · Non-real machine screenshotsImage-by-image consistency check with text version 1.1.9+19 has not yet been completed
Screen guide
Organization name, joining code/QR
Time zone, task default deadline
Current Organization ⋯ → Organization Settings
Buttons, prompts and exception handling 6 items
Modify name → OK/Cancel
Check the organization list again after the name is updated successfully.
Time Zone → Search Time Zone
For example, Taipei; select and check the organization's clock against today's verdict.
Task default deadline → select time/end on the day
The specified time is cleared at the end of the day and local 23:59:59 is used.
Copy code/reproduce code
Copying only takes out the current code; re-production requires confirmation, and the old code becomes invalid immediately.
Allow web login
This shows whether it is enabled by the platform and cannot be freely switched by ordinary users.
The establishment was successful, but the new organization was not automatically entered.
After the organization is successfully established, if automatic switching fails, the APP will return to the organization list. Please select the organization you just created from the list; do not create an organization with the same name again.
Enter from hereOrganization Settings → Dangerous Operations → Transfer Owner
The handover requires confirmation from the successor, and sending a request does not mean that the handover has been completed.
Operation steps
First confirm that the successor is already a member of the organization and check the name.
Click "Transfer Owner", select the successor member, and confirm sending the transfer request.
Please ask the other party to go to "My Organization → My Applications", check "Ownership Transfers Pending Confirmation", click "Accept" or "Reject" after reading the deadline and source.
After accepting, switch back to the organization and both parties will check the new owner badge and set permissions.
How is it completed?
The successor completes the acceptance and the organization displays the correct owner.
Operation reminder
The request has a time limit, please follow the on-screen prompts to complete the confirmation.
Simulation diagram · Click on the image to enlargeSend an ownership transfer request; it will take effect only after confirmation by the successorPicture based on APP 0.1.15+15 · Non-real machine screenshotsImage-by-image consistency check with text version 1.1.9+19 has not yet been completed
Screen guide
Transfer owner → Select members → Send request
My Application → Transfer of Ownership Pending Confirmation
Buttons, prompts and exception handling 2 items
Select new owner → OK
After sending the request, wait for the other party to accept it; if there are no transferable members, first confirm that the successor has joined.
Accept → Confirm/Cancel; Reject
The successor must confirm the permission to take over before accepting, and then switch organizations again.
5.3 Leaving an organization and deleting an organization
Enter from hereMy organization「⋯」→Leave the organization; Organization settings→Delete the organization
Leaving only affects your own membership; deleting an organization will affect all members and organization information, and the two cannot be mixed.
Operation steps
If you just want to exit, the non-owner should select "Leave Organization" in the organization menu, check the name and the description of the loss of permissions, and then decide whether to confirm.
When an owner wants to exit but retain the organization, the ownership transfer must be completed first.
Only enter "Organization Settings → Delete Organization" when you are sure that the entire organization is no longer in use, and first complete the data saving and transfer required by the company.
Read the grace days and permanent deletion time displayed in the confirmation window before deciding whether to confirm; if you need to cancel the deletion, follow the prompts and contact the platform administrator within the grace period.
How is it completed?
The operation results are consistent with the original purpose, and necessary dates and notifications are retained.
Operation reminder
After deleting the organization, members will lose access immediately; after the grace period specified on the screen, the data will be permanently deleted.
Simulation diagram · Click on the image to enlargeConfirmation of leaving the organization; not the same as deleting the entire organizationPicture based on APP 0.1.15+15 · Non-real machine screenshotsImage-by-image consistency check with text version 1.1.9+19 has not yet been completed
Screen guide
Non-Owner: Leaving the organization
Owner: Dangerous Action → Delete Organization
Buttons, prompts and exception handling 2 items
Leave organization → OK/Cancel
Exit only own membership; owner needs to hand over first.
Delete organization → OK/Cancel
Check the name and the number of grace days provided by the screen; members immediately lose access and are permanently deleted after the grace period.
Personal information, accounts and APP versions are handled here; role permissions should be adjusted by the organization administrator.
all users
6.1 Modify personal information, password and log out
Enter from hereSelected organization: More → Personal Settings; Unselected organization: Bottom Personal Settings
The displayed name is easy for colleagues to identify; the account code cannot be changed by yourself.
Operation steps
Open "Personal Settings", check the account, modify the display name and required contact information, and then click "Save Basic Information".
If a user who logs in with an account wants to change the password, fill in the current password, the new password and re-enter the new password, and click "Update Password"; the new password must be at least 8 digits and contain alphanumeric characters as required on the screen.
Google/Apple logins have their emails and passwords managed by the original service, and the page will not provide the same password change operation.
To log out, first confirm that the content you are editing has been completed, then scroll to the bottom of personal settings and click "Log Out".
How is it completed?
Personal information is updated successfully, or you return to the login screen after logging out.
Operation reminder
To add an inspector or supervisor status, the administrator must adjust the role assignment. It cannot be changed from personal settings.
Simulation diagram · Click on the image to enlargeThe account holder changes the password block; third-party logins do not use this process.Picture based on APP 0.1.15+15 · Non-real machine screenshotsImage-by-image consistency check with text version 1.1.9+19 has not yet been completed
Screen guide
Account and basic information → Save basic information
Account login user: change password
Bottom of page: Log out
Buttons, prompts and exception handling 3 items
Copy Email
Click the copy icon to get the current Email; third-party login Email cannot be edited here.
Update password
Enter the current password and the same new password twice; if it is inconsistent or the current password is wrong, correct it according to the prompts.
Log out
Please confirm that the content you are editing has been completed before leaving the account; use the same login method to log in next time.
Enter from herePersonal settings → Dangerous operations → Delete account
Complete the organizational handover and save necessary data before deleting.
Operation steps
If you are still the owner of any organization, transfer ownership first or dispose of the organization as needed.
Confirm that all inspections, reports and attachments that need to be retained have been saved or handed over.
Click "Delete Account", read the grace days, immediate logout and data range listed in the confirmation window, and then decide whether to click "Confirm Delete".
If you change your decision within the grace period, submit a cancellation request through "Contact Us".
How is it completed?
See the message that your account has been deleted and log out. Know the grace period and contact information.
Operation reminder
Inspection records left within the organization belong to the organization and will not be deleted when a personal account is deleted.
Simulation diagram · Click on the image to enlargeBlocked message that the account cannot be deleted because it is still an organization owner.Picture based on APP 0.1.15+15 · Non-real machine screenshotsImage-by-image consistency check with text version 1.1.9+19 has not yet been completed
Screen guide
Dangerous operation → Delete account
Confirmation window: grace days and data range
Buttons, prompts and exception handling 3 items
Still an organization owner
The system lists organizations that are yet to be handed over. Process them first and then apply for deletion.
Confirm deletion/cancel
Log out after confirmation; the grace period and data range depend on the window.
Account deleted → Got it
This account cannot be logged in anymore; you must contact support to cancel within the grace period.
Enter from hereSelected organizations: More → About; Unselected organizations: Bottom About
Providing specific screens and information when reporting a problem makes it easier to find the cause than just saying "it doesn't work."
Operation steps
Open "About" to check the version information, and make a note of the APP version and the mobile phone system used.
Record the current organization, identity, operation entrance, occurrence time and complete error message; it can provide a screen with masked private information.
Open "Privacy Policy, Terms of Use, Contact Us" if necessary; if the APP cannot be opened inline, follow the prompts and use the browser.
Make sure it does not contain passwords, verification codes or other people's unnecessary personal data before sending it to support.
How is it completed?
Support staff can reproduce or find problems based on version, entry, and message.
Operation reminder
The text of this manual has been checked according to the program of APP 1.1.9+19; the schematic diagram is still rebuilt according to APP 0.1.15+15, the date is 2026-09-11, and has not been updated picture by picture. This is not a real-life verification; fonts, spacing, and mobile system windows may still be different.
Simulation diagram · Click on the image to enlargeAbout page; external version does not display internal build numberPicture based on APP 0.1.15+15 · Non-real machine screenshotsImage-by-image consistency check with text version 1.1.9+19 has not yet been completed
Screen guide
Version Information/Privacy Policy/Terms of Use/Contact Us
Buttons, prompts and exception handling 2 items
Version information
Record the APP version and mobile platform for verification.
Privacy Policy/Terms of Use/Contact Us
Use the embedded web page; if it is not supported, use the URL provided on the screen to use the browser instead.
Enter from hereOverview → Update reminder; mobile notification → EZROUND
Identify the two platform operations based on the function name; the mobile system dialog box and the store layout are not necessarily the same.
Operation steps
Click "Update" when "There is a new version available to update" appears in the overview; if "Please update the app first" appears during startup, complete the update before continuing.
After pressing "Update" on Android, it will first try to update within the APP; if it cannot be started, the store page will be opened instead. For iPhone/iPad, open the provided store link and follow the phone prompts.
If the store link cannot be opened, you can go to Google Play for Android or go to the App Store for iPhone/iPad to search for "EZROUND" updates. After completion, go to "About" to check the version.
Click on it after receiving the notification; if you have not logged in yet, log in with the correct account first, and then check the corresponding records, organization invitations or application status.
If the project is still not found after entering the notification page, please check the current organization and role first. If you have not received the push notification, you can also check it from the to-do or invitation list in the APP.
How is it completed?
The version has been confirmed; notification related matters have been found and processed in the APP.
Operation reminder
This chapter does not imitate the Apple/Google login system window; please follow the actual prompts on your phone.
Simulation diagram · Click on the image to enlargeAPP prompt that you must update to continue; the store screen is not in the picturePicture based on APP 0.1.15+15 · Non-real machine screenshotsImage-by-image consistency check with text version 1.1.9+19 has not yet been completed
More operation screens (1 status)
Simulation diagram · Click on the image to enlargeAlternative guide after the forced update page cannot open the store; the button has been restored and can be pressed, and it is not a store system screenPicture based on APP 0.1.15+15 · Non-real machine screenshotsImage-by-image consistency check with text version 1.1.9+19 has not yet been completed
Screen guide
Overview tips → Update
Force update → Update → Android APP update or store/iPhone store
Notification → Login (if necessary) → Corresponding list or record
Buttons, prompts and exception handling 14 items
Confirm operation results
The version has been confirmed; notification related matters have been found and processed in the APP.
When prompted
This chapter does not imitate the Apple/Google login system window; please follow the actual prompts on your phone.
No update prompt
If no update information is found during startup, the APP will not block login; no prompt does not mean that it is confirmed to be the latest version. You can go to "About" to check the current version.
General tips and required updates
Generally, a banner will be displayed in the overview for updates; if "Please update the app first" is displayed during startup, the update must be completed before continuing.
Update prompt changes after logging in
When logging in, switching organizations, or returning to the APP, the prompt may be refreshed with the updated information obtained. At this time, only the banner is updated, and the current screen will not be switched to the forced update page due to this information refresh.
The update button cannot be pressed temporarily.
After clicking Update on the "Please update App first" page, the button will be temporarily disabled during processing. Please wait for the result to avoid clicking repeatedly.
Unable to open store
If the forced update page cannot start the update or open the store, alternative guidance will be displayed below the button; the recovery button can be pressed. Follow the prompts to go to the store to find it. After completing the update, go to "About" to check the version. You cannot judge the update is successful just because the store is open.
New member application notice
Click to enter "User Review". The list is based on the current organization and will not automatically switch to the organization to which the notification belongs. When the application cannot be found, switch to the organization first and then enable user review.
Organization invitation notification
Click it to enter the list of invitations received, and then choose to join or reject it; clicking the notification itself will not join the organization. The invitation may have been revoked or expired, please refer to the current status of the list.
Join application result notification
The approval or rejection notification will open "My Applications". Please check the application results in the list; do not judge the current status solely by the text of the notification.
Inspection record notice
When the notification is accompanied by valid inspection record identification information, the inspection/approval details will be opened. If you do not enter the details after clicking it, search from the related list in the APP; not every notification will open a record.
Login successful but no notification
After logging in or restoring the login status, the APP will try to obtain notification permission and enable push broadcast; whether a query window appears is determined by the phone system and the existing authorization status. Declining notifications or failing to enable push will not prevent login, so being able to log in does not mean that you can receive notifications.
Troubleshooting order for not receiving notifications
First, directly check the to-do, invitation or application list in the APP to avoid missing work; then confirm the notification authorization of EZROUND by the account, organization and mobile phone used. If you still have problems, write down the mobile phone system, APP version, notification event and time of occurrence, and submit them to the administrator or support staff for verification.
Notification just allowed or brief connection failure
After allowing notifications, the phone may still need time to complete push activation. The APP will try to re-register when it obtains a new push certificate; simply switching back to the APP repeatedly does not guarantee an immediate retry, nor does it guarantee that the previous notification will be re-received. During the waiting period, please refer to the list in the APP. There is no need to log out and log in repeatedly.
Tasks, results and approvals should be looked at separately.
For example, "Abnormal + Approved" means that the supervisor has approved the abnormal record, rather than changing the device to normal.
Status and next step comparison
Category
Screen text
what does it represent
Next step
Task
Pending/in progress
The inspection has not started yet or only some inspection points have results.
The inspector completes the tasks point by point.
Task progress
Completed/N/N points
The inspection point report has been completed; whether it has been approved needs to be checked separately.
Check the status of documents awaiting approval and replenishment.
record
To be signed
The information has been sent and is awaiting inspection by the supervisor.
The supervisor comes to inspect the records and process them.
record
Approved
The supervisor has approved this submission.
Check or export when necessary; follow-up exceptions will still be handled according to company procedures.
Records/Tasks
Returned/pending replacement
Supervisor requests additions or corrections.
Read the reasons for return and resend after replacement.
Inspection results
Normal/Abnormal/N/A
The results of this inspection of the equipment are separate from the sign-off status.
Fill in the information truthfully; exceptions require severity and explanation.
term
Overtime/make-up
Overtime refers to exceeding the deadline; make-up refers to the reason for retention when submission is overdue.
Filling in the reason according to the prompts does not mean that it will be completed on time.
If you encounter a problem, look here first
Frequently Asked Questions and Next Steps
Task or device not found
First confirm the organization, identity, site authorization and assignee, then clear the filter and rearrange; "My Tasks" displays the tasks assigned to you.
To use bottom scanning, switch to Inspector in the upper left menu. If there is no such identity, please ask the administrator to check the inspector's authorization.
NFC not read, QR scan failed, tag not bound or no form available
For NFC, please confirm the compatibility between the phone and the tag; for QR, please check the camera permissions, light and image code integrity. Then ask the manager to check the tag status, device binding and form; tasks that have not been assigned need to be checked separately.
Without the Internet, can I start the inspection from scratch?
EZROUND requires an Internet connection to obtain tasks, identify inspection points, load forms and send records. Please confirm that the network is stable before starting the inspection.
Check whether the photos failed to upload, and retry uploading immediately after confirming the network connection; if the failed photos were skipped, the record will not include those photos.
After all the inspections have been completed, why does it still show that it needs to be approved?
Completion points represent progress in filling in the field; supervisor approval is the next step. Please ask your supervisor to confirm the inspection records.
What is the difference between a supplement and a make-up?
Replenishment is in response to the supervisor's return; replenishment is when the task is overdue. Both may occur at the same time, and each needs to be dealt with.
No letters will be sent for targeted invitations. Check the "Organization Invitation" with the invited account and check whether the device notification settings, invitation period and account are the same.
The handwritten signature function of the current reference version has not yet been completed. Ask managers to adjust the template and not treat it as a required completion condition.
Please ask the owner to check the shared space usage. Locking means that it cannot be read temporarily, but does not mean that the data has been deleted; insufficient space may also affect photo uploading and report exporting.
Currently, the APP Report Center provides background CSV export, as well as date, results, approval, and keyword conditions. Don’t assume that the options in the web backend are necessarily available in the APP.
Some of the imports were successful and some failed.
First look at the import details to confirm the successful items, then correct the failed columns and preview again. Do not just resend the entire document.
When a company owner resigns, how will he be handed over?
Initiate the ownership transfer first and complete it after the successor accepts "My Application"; do not delete the organization or account directly.